No edit summary |
(→Method) |
||
| Line 69: | Line 69: | ||
[[File:Pits of Inferno Quest 2.png]] |
[[File:Pits of Inferno Quest 2.png]] |
||
| − | Up in the ladder you will find |
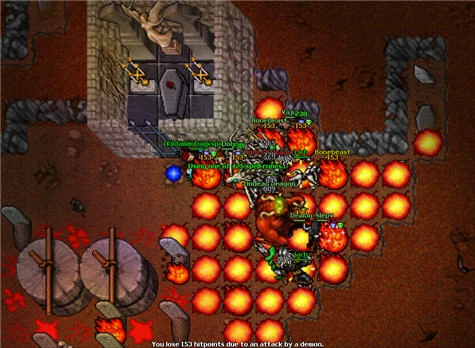
+ | Up in the ladder you will find 2 [[Blightwalker]]s, 15 levers and a book with the following riddle. |
'''l'''ook at the 4 and ignore the 2<br /> |
'''l'''ook at the 4 and ignore the 2<br /> |
||
Revision as of 22:04, 25 February 2012
Legend
The once glorious Nightmare Knights have established themselves under the fiery pits of inferno to fight off evil. The pits of inferno however contain thrones that have a little of the spirit of each of the ruthless seven trapped in there. Absorb their spirit to claim your prize!
Location
Pits of Inferno, under the Plains of Havoc; entrance near the Necromant House.
Dangers
Spectre, Hand of Cursed Fate, Demon, Son of Verminor , Dark Torturer, Hellhound, Defiler, Betrayed Wraith, Phantasm, Destroyer, Lost Soul, Blightwalker, Plaguesmith, Nightmare, Juggernaut, Diabolic Imp, Fury, Hellfire Fighter, Undead Dragon, Banshee, Dragon Lord, and possibly the PoI bosses: Dracola, Mr. Punish, The Handmaiden, The Imperor, The Plasmother, Massacre, Countess Sorrow. Also expect weaker creatures along the way to the Pits of Inferno, such as Cyclopes and Giant Spiders.
Reward
Access to the Hub Shortcut, ability to finish The Inquisition Quest, 100 Platinum Coins, Soft Boots, Backpack of Holding (containing a Silver Rune Emblem (Ultimate Healing), Silver Rune Emblem (Sudden Death), Silver Rune Emblem (Explosion) and Silver Rune Emblem (Heavy Magic Missile)), Stuffed Dragon, Frozen Starlight, Ceremonial Ankh, achievement Ruthless and choose between: Arcane Staff/Avenger/Arbalest.
Required Equipment
- Shovel
- Rope
- Pick
- Holy Tible*
- Blood*
- Oil
- Key 3700
- Destroy Field Rune
If you see a "*" (star) then the item is required for each person, otherwise one can be used for multiple people.
Note: on Optional PvP players can stack and may therefore may not need Blood per person.
To do the quest you will need a team of strong players (level 80 is required, but level 100 is recommended) containing of at least 1 Knight, 1 Druid, 1 Paladin, 1 Sorcerer.
Method
Getting the Key 3700 and the Holy Tible
To get Key 3700 take the south exit of Venore (Which also leads to Shadowthorn) and walk towards the Plains of Havoc. When you are near these plains you will find a hole hidden behind a tree, which leads into a room with several Bonelords and Ghouls. Inside a chest there you will find Key 3700.
You can find the hole (here)
To get the Holy Tible you have to walk to a small mountain near Knightwatch Tower. Inside the mountain will be a chest containing this book, which has the graphics of the old T-Book.
You can find the chest (here)
Note: To get access to the chest you need either levitate spell, or 3 parcels to go up the little mountain.
Necromant's House and PoI DLair
Go to the Necromant House on the Plains of Havoc. The entrance is in the small dungeon, beneath that house, in a small room to the east (here). You have to use a Pick in the northwest of that small room. Go in that hole and you'll see Goshnar's grave, use the Blood on the grave. Note: Is recomended to bring extra vials of blood and oil for the rest of the team.
You will be teleported to a new room. South you will find many Demon Skeletons and Ghosts and some places to explore. North is a Magic Wall, if you have the Holy Tible in your inventory, you will be teleported across when walking on a platform by the magic wall. North is a hole to go to the Well of Life, there are only Butterflies here, and you can drink from the fountain of life. Doing that will get you the achievement "Fountain of Life". East is a sign that says: To the Pits of Inferno.
Down the hole is a bridge, there is a lever you must pull but it is creaking and rusty, pour the Oil on it and it will work for some minutes. Then you will reach a stone, which separates water from lava. Use a Pick on this stone so you are able to walk over the cooled lava. Across is three holes. All three go to the same room, which is full of Dragon Lords and Dragons. Only the north and south hole have a rope-spot to go back up again. In the north-east of the Dragon Lords room is a rope-hole up to the following room.
The Four Ways
File:Pits of Inferno Quest 1.jpg
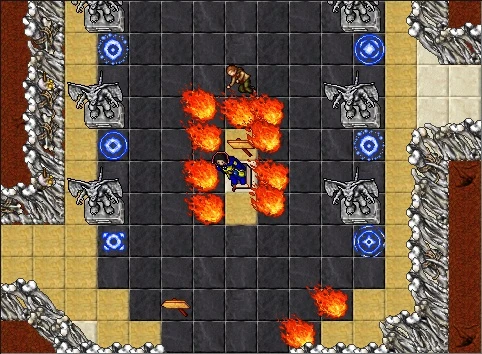
There are 4 paths each filled with the purple fire. Purple fire does 300 damage and not 20 like a normal fire. Each path is made for a certain Vocation. Anyone walking on the wrong path will get a message saying he has entered the wrong path, and will take more and more damage from the fires, eventually leading to death. These are the correct ways to go:
Each vocation needs to rope up a hole into a room with 3 Creatures:
- Knights - 2 Diabolic Imps and 1 Spectre
- Druids - 1 Spectre, 1 Diabolic Imp and 1 Nightmare
- Paladins - 1 Spectre and 2 Nightmares
- Sorcerers - 1 Spectre and 2 Nightmares
In each room there is a lever that has to be pulled, when you pull the lever a wall of fire will disappear in the main room.
Strategies: Its possible as a paladin to wear a Dwarven Ring, Spectre can make you drunk, and run ignoring the monsters, pull the lever and go back down fast or for knights you could wait until the diabolic imps kill the spectre, and only then rush to the imps. Druids also got a diabolic imp + spectre in their room, but they aren't advised to do that, is better to jump up and kill the imps with SDs and then kill the Spectre.
Once all 4 levers have been pulled all 4 fire walls will be gone, and you can proceed into the main area.
There are 2 holes, both leading to the same room which is the actual Pits of Inferno and one emergency exit teleport.
Note: The Firewalls are permanently closed whilst the Stones (after levers) are open.
The Levers
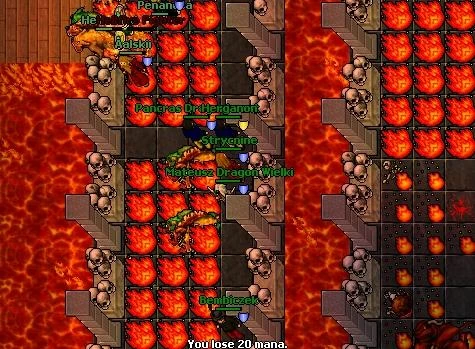
Down are Spectres, Diabolic Imps, Defilers, Destroyers, Hellfire Fighters, Plaguesmiths and Lost Souls. There are 15 switches that must be pulled in the correct order to make the final switch work for a small period of time. This switch makes the 2 rocks near the entrance vanish and you gain access to a ladder. Keep in mind that the rocks reappear after 15 minutes, theres also a emergency exit teleport after the rocks.
Be warned, this teleport doesn't take you out of POI. It teleports you just to the other side of the rocks and you will have to run and rope up to the purple fire room. Once there you may use the teleport at the top of the rope hole. This transports you just to the entrance to the room on the other side of the fire barriers. You will then have to return through the Dragon Lord cave and rope up to the bridge room.

Up in the ladder you will find 2 Blightwalkers, 15 levers and a book with the following riddle.
look at the 4 and ignore the 2
end the 7 with 5 in mind
value of 6 is 9
explain the second of 4
run past the 7
substract 10
use the northeast first
see the colors change
errors are red
look what changes
expect no mercy
six times 10
stupidity is red.
All the levers are USELESS. Just read the first letter of all the lines.
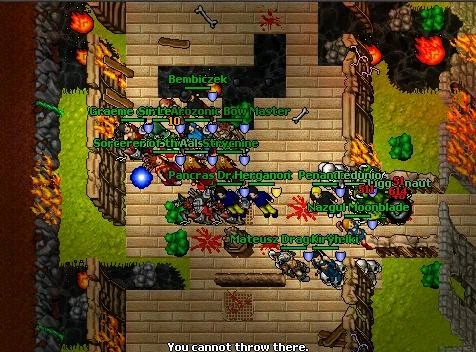
Walk north through the trail, and leave some people behind who will be able to kill Defilers, Hellfire Fighters, Betrayed Wraiths, and some Blightwalkers. One of these people must sit here, south side of the rock in the middle (to open a bridge in the north room with lava), while the rest of the group travel north.
Push both levers to get acess to the hole to go down. Down are Diabolic Imps, Nightmares, Defilers, Destroyers, Hellfire Fighters Phantasms, Dark Torturers, Plaguesmiths and Lost Souls. Walk slowly north until you enter a big room. Travel east and look for the sign that tells you are at the spa. Keep walking that way until you make it to a platform switch. One person must stand on this spot to make a ladder appear in the room with the 15 switches. The ladder will disappear once the person leaves the platform switch, so the people at the levers will have to rope everyone up after killing some monsters up there.
On the levers room after you go up the leader there could be Defilers, Betrayed Wraiths, Hellfire Fighters, Scorpions and the NPC Demonguard who will set you on fire if you talk, here you will have to rope the team that went to the spa. Now you can go up a rope hole and proceed into the maze.
The Maze
In here travel through the maze into a room in the north-east, which is a dead end. Be aware some tiles in the maze are traps that will teleport you somewhere else in the maze or you will be send to the begining of the maze. Once you have made it to the dead end you will have to use a pick to go down into the next room. Warning: when you walk in the wrong tiles some times you will be send to the start of the maze, infront of where you are teleported is the hole that takes you back to the Betrayed Wraiths, Defilers and Blightwalkers so be careful where you step after making a mistake.
In the following screen you can see which is the best way for fulfilling this task:
File:Pits of Inferno Quest 3.jpg
Summary, by letters: A-B-R-F-G-I-J-K-P
Key:
Yellow line: Path to follow.
Dotted lines: connections between ropeholes.
Yellow letters: Teleport that you MUST take.
Green letters: Exit of the teleport with the same letter.
Red letters: Teleport that you MUST NOT take.
Purple letters: Exit of the wrong teleports with the same letter.
Red X: Possible teleports that MUST NOT be taken.
Blue R and light blue R: Ropespots that leads to the upper cave where you must pass.
Red and Purple R: Ropespots that you dont need to pass.
Big blue P: Pickhole that leads to the exit of the maze.
You will see a rock to the left with a ladder behind it, and a path east. Run east to get to a switch. Kill the Hellfire Fighters but be careful of the damage from the Magicthrowers. Once you pull the switch the stone will disappear for some minutes. Go back to the ladder and go up. You will be in a room with a bridge. As you walk you will fall down to a level below, and then you just have to rope back up. This is to prevent people from turning back to one of the earlier areas. Finally you make it to two holes. The one on the north will bring you back to the Plains of Havoc Slime cave with no way back in, and the south one will lead you to the lair of the Ruthless Seven.
Down that hole you will find a level 80 door and a skeleton. Open the skeleton to receive a Pirate Backpack. Inside it you can find a Ceremonial Ankh, a Death Ring, a Life Ring, 3 Orichalcum Pearls, 5 White Pearls, 2 Soul Orbs, 11 Platinum Coins, 2 Sudden Death with 1 charge each, 3 Ultimate Healing Rune, Blank Rune and a Great Mana Potion.
Now make your choice. Head back with this loot, or go for the bigger prize and pass the level 80 door.
Main Room
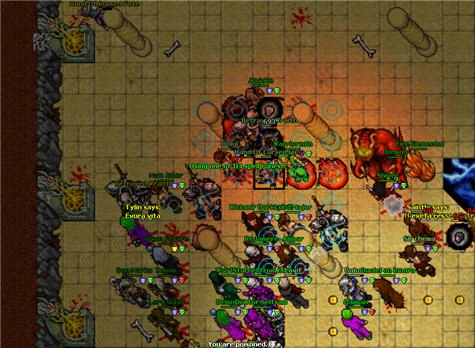
To continue with the quest go through the Level 80 door and kill the Creatures there. Go down the ladder and then head north. In this room there will be a teleporter into a room that looks the same, but has 2 Magicthrowers, some Hellfire Fighters and a switch on the floor that will set the whole room on fire. When you enter this second room a stone will be blocking the people behind you, you will have to flick the switch several times to make everyone pass. Once everyone is inside, continue north.
You will enter a room with some Phantasms, Betrayed Wraiths, Plaguesmiths, Blightwalkers and a Hand of Cursed Fate. This is the main room with 7 teleporters into the Ruthless Seven thronerooms.
What you have to do here is enter each room and step twice on the throne to absorb a bit of their spirit. Note: Remember to check the Quest Log after you have stepped on a throne to be sure you have completed that throneroom.
NOTE: It's recommended to leave someone behind to block the spawn in the teleport room.
Throneroom of Verminor, the Plaguelord
NOTE: There are some invisible bridges (Poison) near the throne, you will have to walk over them to reach the throne.
In this throneroom you will meet Defilers, Plaguesmiths, Sons of Verminor, Blightwalkers and possibly The Plasmother. Go south and follow the way to reach the throne, step on it twice to absorb some of Verminors spirit, then return to the teleporter.

Throneroom of Infernatil, the incendiary of hell
In this throneroom you will meet Hellfire Fighters, Hellhounds, Demons and possibly The Imperor. often in large groups at the same time. Walk slowly here and try to lure them one at a time. Near the throne will be a switch hidden beneath fire, use destroy field to uncover it so you can get to the throne, step on it twice to absorb some of Infernatils spirit, then return to the teleporter.
Throneroom of Tafariel, the mistress of the damned
In this throneroom you will meet Banshees, Dark Torturers, Demons, Lost Souls and possibly Mr. Punish. Follow the path slowly to avoid too many creatures at once until you reach the throne, step on it twice to absorb some of Tafariels spirit, then return to the teleporter.

Throneroom of Apocalypse, total destruction
You'll appear in some sort of wrecked ship. In this throneroom you will meet Destroyers, Furies, Demons, Juggernauts and possibly Massacre. You will find more monsters as you move on, keep going slowly since they can do a lot of damage. Once you reach the throne step on it twice to absorb some of Apocalypses spirit, then return to the teleporter.
Throneroom of Pumin, the Lord of Despair
You will enter a long hallway with 4 dead bureaucrats. To be able to enter the throne room you need permission which you can get by asking for forms. This is what you should say to the NPC's: (NPC's are ordered in the way you meet them)
A Dead Bureaucrat 1: Hi - Pumin - your_name - your_vocation - Pumin
A Dead Bureaucrat 4: Hi - Pumin - your_name - your_vocation - 356
A Dead Bureaucrat 3: Hi - Pumin - your_name - your_vocation - 145
A Dead Bureaucrat 1: Hi - 411 - no
A Dead Bureaucrat 2: Hi - 287
A Dead Bureaucrat 1: Hi - 411 - yes
A Dead Bureaucrat 3: Hi - 145
A Dead Bureaucrat 4: Hi - 356
A Dead Bureaucrat 1: Hi - 356
After this you have access to the northern teleport. Wait till everybody is ready and go in. There will be Spectres, Betrayed Wraiths, Demons, Hands of Cursed Fate, and possibly even The Handmaiden. Keep an eye on your minimap, since this room is filled with invisible walls. Once you reach the throne, step on it twice to absorb some of Pumins spirit, then return to the teleporter.
Note: After the 8.1 Winter 2007 update, there is a floor above this seal. It is slightly smaller than the actual room. The only way to get up it is through levitation. The beginning is roughly 5 sqm north of the teleporter so there really is no way you can "skip" the seal by levitating up and running across, especially since it ends about 15 sqm from the actual throne. Once up, the floor is see through, so you can have fun running around looking down upon the seal without being touched! Hence, the random pillars throughout the room.
Throneroom of Bazir, the great deceiver, lord of the lies
NOTE: Check your map, because there are certain rope spots which takes you back to the Dragon Lord spawn of Pits of Inferno, with no way to return to this throneroom.
In this room you will meet Nightmares, Phantasms, Demons, Goblins looking like Demons and possibly Countess Sorrow. You will find a lot of things put in here just to distract you, like switches and doors. Do not touch any of the switches since you might get teleported into rooms filled with Phantasms.
For moving around the maze, follow green line in this map (3 images, for floors -8, -7 and -6):
File:Pits of Inferno Quest Bazir 1.jpg
File:Pits of Inferno Quest Bazir 2.jpg
File:Pits of Inferno Quest Bazir 3.jpg
Once you arrive to the end of the yellow line, use the SOUTHERN lever which will make a teleport appear. Enter in that teleport.
You will be in a room with some platinum coins, step onto them and you will be teleported to another room. In this area walk northwest towards a invisible ladder in the corner of the room, go up then walk right into the teleport. You'll find yourself in a room with void all around. Walk towards the chest on the south to get teleported into the next room. Move towards the tapestry on the left, and use it to uncover a mirror. When you use the mirror you get teleported into the room with Bazirs throne. Step on it twice to absorb some of Bazirs spirit. For going outside the room, head to the western Knight statue, which actually is a teleport back to quest main room.
File:Pits of Inferno Quest Bazir 4.jpg
File:Pits of Inferno Quest Bazir 5.jpg
File:Pits of Inferno Quest Bazir 6.jpg
Throneroom of Ashfalor, the right hand of Urgith. The general of the undead hordes.
When you go through the teleport, you'll find yourself in a graveyard. In this room you will meet Liches, Demons, undead Dragons and possibly Dracola guarding the throne. Walk south, but be careful not to make the Undead Dragons use their wave attacks on the entire team. Walk on to the throne and step on it twice to absorb some of Ashfalors spirit, then return to the teleporter.
The Reward
In the teleporter room go north through the 7 energy doors and enter the teleport, here there will be lots of traps which will hurt you a little, mind your hitpoints as you walk on. You will arrive at a locked door with an NPC A Ghostly Sage next to it. Ignore the NPC and open the door with Key 3700. Enter the teleport on the south to get in the room with the rewards, to nort of the teleport theres a room thats looks like the dream machine with a sword in the center.


Get your rewards, and choose wisely! Now walk your back in the realm of the Ruthless Seven, and follow the signs that tell you where the exit is. Another option its ask a teleport to the NPC A Ghostly Sage located just before the rewards room. You will be able to leave through the Slime cave in the Plains of Havoc.
After Update 8.4, once you visit reward room, you are able walk straight to the hall between the thronerooms trough a teleport located on the second floor of the Necromant House. Note that whoever did this quest before the update, must go into the reward room again in order too be able to go through the teleporter.
Dialogs transcription
Note: Some dialogs may be different may be depending on your vocation and gender.
Dialog with the 1st bureaucrat
Player: hi
A dead bureaucrat: Hello beautiful lady, welcome to the atrium of Pumin's Domain. We require some information from you before we canlet you pass. Where do you want to go?
Player: pumin
A dead bureaucrat: Sure, where else. Everyone likes to meet my master, he is a great demon, isn't he? Your name is ...?
Player: your_name
A dead bureaucrat: Alright your_name. Vocation?
Player: your_vocation
A dead bureaucrat: Huhu, please don't hurt me with your wand! Reason of your visit?
Player: Visit Pumin
A dead bureaucrat: How very interesting. I need to tell that to my master immediately. Please go to my colleagues and ask for Form 356. You will need it in order to proceed.
Dialog with the 4th bureaucrat
Player: hi
A dead bureaucrat: Hello beautiful lady, welcome to the atrium of Pumin's Domain. We require some information from you before we can let you pass. Where do you want to go?
Player: Pumin
A dead bureaucrat: I'm not sure if you know what you are doing but anyway. Your name is?
Player: your_name
A dead bureaucrat: Alright your_name. Vocation?
Player: your_vocation
A dead bureaucrat: S O R C E R E R, is that right?! What do you want from me?
Player: 356
A dead bureaucrat: Sorry, you need Form 145 to get Form 356. Come back when you have it
Dialog with the 3rd bureaucrat
Player: hi
A dead bureaucrat: Hello beautiful lady, welcome to the atrium of Pumin's Domain. We require some information from you before we can let you pass. Where do you want to go?
Player: Pumin
A dead bureaucrat: Tell me if you liked it when you come back. What is your name?
Player: your_name
A dead bureaucrat: Alright your_name. Vocation?
Player: your_vocation
A dead bureaucrat: I was a sorcerer, too, before I died!! What do you want from me?
Player: 145
A dead bureaucrat: That's right, you can get Form 145 from me. However, I need Form 411 first. Come back when you have it.
Dialog with the 1st bureaucrat
Player: hi
A dead bureaucrat: You again. I told my master that you wish to end your stupid life in his domain but you need Form 356 to get there. What do you need this time?
Player: 411
A dead bureaucrat: Form 411? You need Form 287 to get that! Do you have it?
Player: no
A dead bureaucrat: Oh, what a pity. Go see one of my colleagues. I give you the permission to get Form 287. Bye!
Dialog with the 2nd bureaucrat
Player: hi
A dead bureaucrat: Hey! You are back! How can I help you this time?
Player: 287
A dead bureaucrat: Sure, you can get it from me. Here you are. Bye
Dialog with the 1st bureaucrat
Player: hi
A dead bureaucrat: You again. I told my master that you wish to end your stupid life in his domain but you need Form 356 to get there. What do you need this time?
Player: 411
A dead bureaucrat: Form 411? You need Form 287 to get that! Do you have it?
Player: yes
A dead bureaucrat: Great. Here you are. Form 411. Come back anytime you want to talk. Bye.
Dialog with the 3rd bureaucrat
Player: hi
A dead bureaucrat: Back again? How can I help you this time?
Player: 145
A dead bureaucrat: Well done! You have form 411!! Here is Form 145. Have fun with it.
Dialog with the 4th bureaucrat
Player: hi
A dead bureaucrat: Hey! You are back!! How can I help you this time?
Player: 356
A dead bureaucrat: You are better than I thought! Congratulations, here you are: Form 356!
Dialog with the 1st bureaucrat
Player: hi
A dead bureaucrat: You again. I told my master that you wish to end your stupid life in his domain but you need Form 356 to get there.What do you need this time?
Player: 356
A dead bureaucrat: INCREDIBLE, you did it!! Have fun at Pumin's Domain!
Player: bye
A dead bureaucrat: Good bye and don't forget me!