m (Fixed link to mines) Tags: Visual edit apiedit |
Dunderbullen (talk | contribs) m (Minor addition to waters of life) Tags: Visual edit apiedit |
||
| Line 315: | Line 315: | ||
Now find your way to the eastern side of the "safe zone"—[http://tibia.wikia.com/wiki/Mapper?coords=131.137-126.23-11-4-1-1 here], and step on the north-eastern ramp. This will take you to a chamber with 3 [[Shiversleep]]. Use the [[Pendulum]] on the [[Shiversleep]] to hypnotize them. They will turn into a [[Shimmying Butterfly]]. When you have hypnotized all 3 of the [[Shiversleep]], go on the [[Instable Vortex]] on the west side of the chamber. |
Now find your way to the eastern side of the "safe zone"—[http://tibia.wikia.com/wiki/Mapper?coords=131.137-126.23-11-4-1-1 here], and step on the north-eastern ramp. This will take you to a chamber with 3 [[Shiversleep]]. Use the [[Pendulum]] on the [[Shiversleep]] to hypnotize them. They will turn into a [[Shimmying Butterfly]]. When you have hypnotized all 3 of the [[Shiversleep]], go on the [[Instable Vortex]] on the west side of the chamber. |
||
| − | You appear in some kind of reward room. Open the [[Pile of Bones]] on the north-west side of the area to receive an [[Essence of Wishful Thinking]]. Step on the stairs when you are ready to leave because you will appear outside, perhaps in the middle of a horde of |
+ | You appear in some kind of reward room. Open the [[Pile of Bones]] on the north-west side of the area to receive an [[Essence of Wishful Thinking]]. Step on the stairs when you are ready to leave because you will appear outside of the cistern, perhaps in the middle of a horde of Retching Horrors and Choking Fears. |
'''Note''': only one person can enter the [[Shiversleep]] room at once. If you spend too long in the room / the reward room you will be kicked out back to the "safe zone'—[http://tibia.wikia.com/wiki/Mapper?coords=131.137-126.23-11-4-1-1 here]. If you are with a team, it is strongly recommended that you all get the reward from the [[Pile of Bones]] and wait to be kicked out. Otherwise, you will have to fight the group of monsters outside on your own. |
'''Note''': only one person can enter the [[Shiversleep]] room at once. If you spend too long in the room / the reward room you will be kicked out back to the "safe zone'—[http://tibia.wikia.com/wiki/Mapper?coords=131.137-126.23-11-4-1-1 here]. If you are with a team, it is strongly recommended that you all get the reward from the [[Pile of Bones]] and wait to be kicked out. Otherwise, you will have to fight the group of monsters outside on your own. |
||
Revision as of 13:18, 14 May 2015
Legend
Nightmarish creatures are lurking in an island recently found by the Inquisition...
Location
Dangers
Frazzlemaw, Guzzlemaw, Silencer, Shock Head, Lavaholes, Retching Horrors, Choking Fears, Terrorsleep, Shiversleep, Feversleep, Sights of Surrender, Demon Outcasts, Plaguesmiths, Blightwalkers, Hellhounds, Juggernauts, Dark Torturers, Mawhawk, Terofar, Zavarash, Horadron, Prince Drazzak, Gaz'haragoth, Minion of Gaz'haragoth, Nightmare of Gaz'haragoth.
Reward
Clusters of Solace, Essences of Dread, Essences of Wishful Thinking, server-wide ability to access Guzzlemaw Valley and Upper Roshamuul, and create or refine Umbral Items.
Introduction
This quest is entirely focused around Roshamuul. Travel there by Thais.
The quest features a permanent world change. The world change has 4 stages. The first stage allows only access to Lower Roshamuul. The second stage allows access to Lower Roshamuul and the Guzzlemaw Valley. The third stage unlocks Upper Roshamuul making the entire continent accessible. During the third stage, Gaz'haragoth will spawn atop the central mountain in Upper Roshamuul. When Gaz'haragoth is slain, servers will progress to stage 4, when the Upper Roshamuul city NPCs will appear.
- To progress to the second stage, servers must contribute to rebuilding the Roshamuul bridge. This can be done by delivering mortar and killing monsters in Lower Roshamuul.
- To progress to the third stage, servers must break the wall in northern Guzzlemaw Valley. This can be done by blowing horns, desecrating shrines, luring silencers and killing sights of surrender.
- To progress to the fourth stage, Gaz'haragoth must be defeated on the central Upper Roshamuul mountain.
In addition, there are (non-permanent) world changes which spawn Sights of Surrender. If servers do enough tasks in Guzzlemaw Valley, Sights of Surrender will spawn in the area. If servers do enough tasks in Upper Roshamuul, an area north of the depot will open granting access to a small Sight of Surrender spawn.
As usual, servers change stages only during a Server Save.
The world changes are not meant to be easy or quick. Servers can expect to stay on the first stage for at least a week, and the second stage a month. Low-population servers will have a harder time progressing stages.
Keep in mind that, because this is a server event and because it is permanent, there is no practical way to determine the amount of tasks required. However, servers can expect to wait some days or even weeks for full access.
The NPCs who give missions are Sandomo in Lower Roshamuul camp, and the Dream Butterfly in Upper Roshamuul east side. For some missions, particularly the missions to find things on the ground, you will not need to get the mission, you will be put on the quest when interacting with the environment.
Progressing Stage 1
Though precise values may never be known, the servers that have already passed stage 1 do provide some estimates.
The kill statistics of the worlds that have succeeded suggest approximately 30,000 Frazzlemaws (76%) and 9,500 Silencers (24%) will be slain in building the bridge. The suggested (not proven as it is near impossible to prove) goal is between 100,000 - 150,000 inquisition gold earned across the server.
Lower Roshamuul: The Giant Traverse
In order to repair the bridge and advance further, the following tasks must be done. Completing a task also awards some Inquisition Gold. Rewards can be managed with Sandomo by the use of the keyword gratitude, and then repairs.
Required Equipment
Killing Monsters
It's possible to kill local creatures in order to gain Inquisition Gold.
- Silencers are worth 1 Inquisition Gold
- Frazzlemaws are worth 1 Inquisition Gold
Delivering Mortar
Finishing task will award you 100 Inquisition Gold.
For this task you will need at least 2 Buckets. You can do multiple Mortar tasks at once so bring as many buckets as you want.
Your task is to bring Bucket Full of Mortar to the bridge. You need to get a Bucket Filled With Gravel and a Bucket Filled With Chalk, mix them together and add water.
Gravel: Use your pick on gravel rocks found on the mountain and the south-eastern shore. You must successfully mine 10 gravel rocks in order to get a Bucket Filled With Gravel. Note that until you successfully mine all 10, you will have a regular Bucket - you cannot share a bucket because the variable applies to your character until you fill the bucket.
There appears to be a 50% success rate for mining gravel (statistics).
- On success, Fine Gravel appears on the ground. Use the fine gravel to add it to your count.
- Message: Crushing the stone produces some fine gravel.
- On failure, a Frazzlemaw spawns instead.
- Message: Crushing the stone yields nothing but slightly finer, yet still unusable rubble.
In any case, the gravel rock disappears and returns after 1 minute.
Gravel Locations


Chalk Deposit Amounts

Chalk deposit amounts
Chalk: descend any of the ramps in the south-eastern area and you will appear in a random cave, not necessarily the one below the ramp. Continue exiting and entering caves until you reach one that has Chalk on the ground. Use the ground chalk to add it to your count, but note that spots which have been used recently will not count. It takes 2 minutes for chalk to respawn. After gathering from 10 chalk spots, you will obtain a Bucket Filled With Chalk.
Note: Each ramp has a destination which changes every 2 minutes. If you find yourself going around in circles, run to a different ramp or wait 2 minutes for the destinations to change.
Note: Sometimes you may appear in a lava cave with active Lava Holes that attack you; run to the far left side and enter the Instable Vortex to escape.
Once you have at least one bucket of gravel and one bucket of chalk, use one on another to create Gravel and Chalk in a Bucket. Use it with a bucket of water to make a Bucket Full of Mortar. Now travel to the bridge on top of the mountain and use your bucket with mortar in a Trough for Mortar. The troughs are next to Mortis.
File:Bucket Filled With Gravel.gif Gravel + File:Bucket Filled With Chalk.gif Chalk = ![]() Gravel and Chalk
Gravel and Chalk
![]() Gravel and Chalk +
Gravel and Chalk + ![]() Water =
Water = ![]() Mortar
Mortar
Note: you can fill a Bucket with water at the Small Brooks or anywhere at the camp shore.
Mining gravel, 217 trials.
| Item |
Amount |
Percentage |
Tries to get 1 |
|---|---|---|---|
| Failure | 116 | 53.46% | 2 |
| Success | 101 | 46.54% | 3 |
Lower Roshamuul: The Walls of Roshamuul
Blowing Horns
Piles of Bones Locations
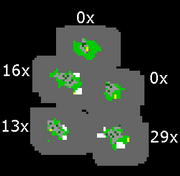
In the southern human camp, find the Mouthpiece for a Horn in a Box, you can obtain one every 30 minutes. Go into the Guzzlemaw Valley and far east. Along the mountains you will find stacks of bones, the kind you are looking for is called Large Pile of Various Bones. However, at least one such pile (![]() ) is beneath an immoveable stone, making it unusable. Also, some are in Mawhawk's lair, accessible rarely.
) is beneath an immoveable stone, making it unusable. Also, some are in Mawhawk's lair, accessible rarely.
- You see a large pile of various bones.
Several large and curved bones are protruding from this pile.
Use the pile of bones and one of two things will occur:
- You succeed, obtaining Crude Horn of Bone (Amidst the pile of various bones you find a large, hollow part, similar to a pipe.)
- You fail, spawning a Guzzlemaw (You ransack the pile but fail to find any useful parts.)
In any case the pile will become unusable for 2 minutes.
When you succeed and have a horn, use the mouthpiece on the horn to obtain a Crude Horn with Mouthpiece. With it, go to the wall toward Upper Roshamuul and use the horn on any part of the wall.
")
")
Desecrating Shrines
Locations of Maw Shrines
Go to Guzzlemaw Valley and search for Silencer Excretion, which can be found on the ground anywhere in vicinity of Silencers. When you obtain Silencer Excretion, find a maw shrine (a Skull held by bamboo Branches) and desecrate it by using the excretion on the Skull part of the shrine. A Guzzlemaw will spawn near the shrine when you desecrate it.
This task is worth 10 inquisition gold. You can do this mission every 10 minutes (as of 10.34)
")
Luring Silencers
Kill Silencers for Silencer Resonating Chambers. You may need a lot. Go to the Silencer Plateau (here) and use the Silencer Resonating Chambers. It may take several in order to complete your task, but you will receive an orange message similar to that of a Silencer when you are successful.
You can use multiple Silencer Resonating Chambers at once, however when 6 resonating chambers have been used succesfully (it has chance of breaking with no result), Silencer raids will start on the Silencer Plateau. Since the raids beginning you cannot use Chambers on the Plateu for the next 30 minutes. The silencer raid includes 4 waves of Silencers, culminating in a wave of 3-5 Sights of Surrender.
Note: There is a possiblity that a single Silencer or Sight of Surrender from each raid wave spawn downstairs due to a bug causing monsters spawning on the stairs during a raid.
Each Resonating Chamber succesfully used on the Plateu yields 50 inquisition gold.
")
Killing Sights of Surrender
Kill Sights of Surrender. They can be found in Guzzlemaw Valley if the server has completed enough Guzzlemaw Valley tasks the days prior and on the Silencer Plateau as part of the Luring Silencers mission. In Upper Roshamuul you may also find them north of the depot, but this only opens if the server completes many Dream Butterfly tasks the days prior.
Each Sight of Surrender you kill, you gain 10 inquisition gold.
Upper Roshamuul
First of all, go to the Dream Butterfly in eastern Upper Roshamuul. You can accept all tasks at once, and it is recommended to do so. Other tasks are found naturally in the environment.
Ancient Dreams
Go to Morax and ask him about ancient dreams. Go to the Roshamuul Mines and get the Dream Nebuliser out of the box at the entrance. Throughout the entire mine you will find Fog Lanterns on the wall, as well as Traces of Ancient Dreams. Use these lanterns and for 10 seconds you will have the ability to extract Ancient Dreams from the Traces of Ancient Dreams with the Dream Nebuliser.
The following can occur when attempting the extraction:
- You fail, you destroy the ancient dream and obtain Remains of a Crude Dream (You blasted the dream to pieces.)
- You fail, spawning a Feversleep or a Terrorsleep (The nebuliser accidentally liberated hostile living energy.)
- You succeed, obtaining an Ancient Dream (You successfully removed an Ancient Dream from the rock.)
The Fog Lanterns replenish after 2 and a half minutes, while the Traces of Ancient Dreams recover after 5 minutes. However, you may use multiple Fog Lanterns and Traces of Ancient Dreams.
Do this until you obtain at least 3 Ancient Dreams. You can mine up to 9 before your Dream Nebuliser breaks but you only need 3 per task. Take the Ancient Dreams back to Morax and he will exchange 1 Essence of Dread for 3 Ancient Dreams.
")
")
")
")
A Cup of Tea
Throughout Upper Roshamuul you will find many Pottery Pieces. Some of them are quest objects. Use them to obtain the quest items you require.
CipSoft has stated that there are 3 flasks for each of the quest items. They are:
You only need one of each. When you get all three items, use the Bowl of Tea Leaves on the Tea Cup to get Filled Cup.
Now go to Dream Sand River (here), and use the Filled Cup on the water there. Now use the Tea Spoon on the Filled Cup.
Go to Morax's bed (up here) and use his pillow. You will appear in his dream. Go down and find him and give him the tea by saying parched. The mission is now complete and you receive 1 Cluster of Solace.
")
A Retched Beginning
Get this task from the Dream Butterfly. Your task is to slay 100 Retching Horrors. You can find them all over the surface of Upper Roshamuul. Report back to the Dream Butterfly when you are done. You will receive 3x Essence of Dread for doing this. Your kills before getting the task still count; by receiving the task you get the benefit of a quest log tracker.
Face Your Fears
Get this task from the Dream Butterfly. Your task is to slay 100 Choking Fears. You can find them all over the surface of Upper Roshamuul. Report back to the Dream Butterfly when you are done. You will receive 3x Essence of Dread for doing this. Your kills before getting the task still count; by receiving the task you get the benefit of a quest log tracker.
Mend What's Broken
Get this task from the Dream Butterfly.
All around Upper Roshamuul you will find objects that respond to usage. Some of them glimmer until they are used. When you use these objects you have a chance to obtain a Broken Dream. You may need a lot of these. If you fail, either nothing can happen or you can find some rubbish, depending on the object. These objects take 5 minutes to recover to their usable state and the chance of finding Broken Dreams is fairly low, so it is recommended to search for more objects.


Possible outcomes are:
- Nothing (Nothing happens.)
- Broken Dream (You found a broken dream.)
- Piece of Iron (You poke into the thing, but there's only some rubbish inside.)
- Old Twig (A twig dropped out of the cypress. It's rubbish.)
- Some Leaves (You shook some leaves off the cypress. They're rubbish.)
- Crystal Rubbish (You shake out the glowing contents, but it's only dew and rubbish.)
- Rubbish (You cut open the eggs, but there's only rubbish inside.)
- maybe more.
Half-Buried Face Locations
When you have Broken Dreams, search the ruined city for Half-Buried Faces, giant faces protruding from the surface. Not all of the face is called "half-buried-face", find the part of the face with the correct name (the mouth). Use Broken Dream on the face. The following can occur:
- Fail (The Broken Dream crumbles in your hands.)
- Fail and spawn Nightmare (Uh-oh. You mended a nightmare.)
- Succeed and spawn Shimmying Butterfly (A dream butterfly emerges and flits, flits, flits away. Hurray!)
Note that after you spawn a Nightmare or a Shimmying Butterfly, you have to wait roughly 2.5 to 3 minutes before you can use another broken dream on that face. If the dream breaks you can use another immediately.
When you successfully free 3 dreams (3x Shimmying Butterfly), go back to the Dream Butterfly and report about your mend mission. The butterfly will direct you to a Stony Pond, just follow the coast south-east of the Dream Butterfly and use the Stony Pond (here). Get your reward, 2x Essence of Wishful Thinking, and go back up the stairs. You cannot free more than 3 butterflies per task as of 10.36.
You can repeat this task 2 hours after turning it in. When you free 100 Shimmying Butterflies (34 tasks) you will receive the Dream Wright achievement.
")
")
")
Not Afraid Of The Dark
Get this task from Morax with the keyword terrors. Your task is to kill 100 Terrorsleeps. You can find them in the Roshamuul Mines and the Roshamuul Cistern. Note that Feversleeps do not count for this task. Report back to Morax when you are done. You will receive 2x Essence of Dread for doing this. Your kills before getting the task still count; by receiving the task you get the benefit of a quest log tracker.
Soothing Bad Dreams
Get this task from the Dream Butterfly. You will receive a Delicate Pan.
Go to the far north-eastern part of Upper Roshamuul (here). On the mountain there is a river (the Dream Sand River). Use the water to gather Dream Sand. While here, consider going south a bit to find a Bowl of Tea Leaves for the A Cup of Tea mission.
- Nothing (You found some useless pebbles and crystals.)
- Obtain Dream Sand (You find some dream sand nuggets in your pan.)
- Lose your Delicate Pan (You accidentally drop the pan in the whirling water.)
Use the water repeatedly until you lose your pan (recommended).
Sneeze Blossom Locations
Now you must find the 3 special Sneeze Blossoms to learn the song. You cannot use any regular Sneeze Blossom like the ones near the Dream Butterfly, they are special quest flowers. When you use each of the blossoms, the blossom will hint you to another; you do not need to follow this advice. The locations of the 3 blossoms are:
- On the coast (here). It will hint you to the aqueduct. Recommended to start here as you are already there when you collect Dream Sand.
- In the aqueduct (here). It will hint you to the waterfall.
- Near the waterfall (here). It will hint you to the coast.
It is recommended to do it in the order provided; coast—aqueduct—waterfall.
")
")
")
When you use the third blossom, use it again to learn the song. You will receive Strange Good Night Songs.
Bad Dream Locations

Now that you have the songs, find Bad Dreams in the eastern part of Upper Roshamuul. Equip the Strange Good Night Songs (shield slot) and use the Dream Sand on the Bad Dreams. You will receive a message saying <humming a disturbing grating tune> - The dream settles down a little. The Bad Dream vanishes. Repeat the process with 4 more Bad Dreams to complete your mission.
After you have soothed 5 Bad Dreams, go back to the Dream Butterfly. It will tell you to go to the Junkyard Tar Lake room to claim your reward.
Go to the Junkyard Tar Lake and find the staircase surrounded by tar (here). Step on the staircase and open the bookcase to receive 3x Essence of Dread.
")
")
Waters of Life
Go to Morax and ask him about the waters, and offer to help him. He will give you a Pendulum. Note:This area works the same way as the Pits Of Inferno Quest Maze. Bring many supplies for this mission and many Energy Wall Runes to trap the Terrorsleeps and Feversleeps.
Go to the Roshamuul Cistern in north-eastern Upper Roshamuul. Find your way to the Water Wheels - here, down here, and down here. You will need to use the Pendulum to clear any Poison Spines in your path. Pull all 3 of the levers.
Note: Only the players who pulled all 3 levers may enter the Shiversleep chamber. Therefore, each player must pull all 3 levers. After a lever is pulled, it takes ~2 minutes before the lever can be pulled again.
")
")
")
Now find your way to the eastern side of the "safe zone"—here, and step on the north-eastern ramp. This will take you to a chamber with 3 Shiversleep. Use the Pendulum on the Shiversleep to hypnotize them. They will turn into a Shimmying Butterfly. When you have hypnotized all 3 of the Shiversleep, go on the Instable Vortex on the west side of the chamber.
You appear in some kind of reward room. Open the Pile of Bones on the north-west side of the area to receive an Essence of Wishful Thinking. Step on the stairs when you are ready to leave because you will appear outside of the cistern, perhaps in the middle of a horde of Retching Horrors and Choking Fears.
Note: only one person can enter the Shiversleep room at once. If you spend too long in the room / the reward room you will be kicked out back to the "safe zone'—here. If you are with a team, it is strongly recommended that you all get the reward from the Pile of Bones and wait to be kicked out. Otherwise, you will have to fight the group of monsters outside on your own.
Now go back to Morax and tell him about your mission. He will tell you to keep the essence.
")
")
")
The First Mate
Around Lower Roshamuul and Guzzlemaw Valley there are 11 Messages in Bottles that can be found all around the shore. Every Server Save, one of the bottles will be floating around at its designated location and can be fished out. When you attempt to fish them out ("You cast your fishing rod to see if you can catch the bottle.") you can fail (no additional message) or succeed ("You find a letter inside the bottle. It says: 'message''". You can try as many times as you want to fish out the bottle, and also after succeeding the Message in a Bottle will remain in the water for other players to find.
Going clockwise from the south of the human camp of Lower Roshamuul, the 11 messages and their locations are:
Locations of Messages in Bottles
| Location | Message |
|---|---|
| here | Three |
| here | green |
| here | you |
| here | will |
| here | show |
| here | where |
| here | must |
| here | to |
| here | dig. |
| here | bedded |
| here | stones |
- The word dig has a full stop at the end, so this may be the final word in the sentence.
- The word three has a capital letter, so this may be the first word in the sentence.
The sentence these words are most likely intended to form is "Three stones, bedded to green, will show where you must dig." Players who have fished all messages can dig a tile located on the eastern part of the Guzzlemaw Valley between 3 stones which stand on mossy ground. You will be teleported to a room with a skeleton to the east. When using the skeleton you receive the achievement Nevermending Story and 2 papers.
These papers describe captain Marv and the first fleet to Roshamuul. The captain learned to mend a ring and was consumed by it. The author concludes that there are other rings, but runs out of ink before he can explain what must be done. The texts suggest that Roshamuul is yet to be fully explored.
There is no known continuation for this mission as of yet.
Transcripts
Lower Roshamuul: The Walls of Roshamuul
Upper Roshamuul
A Retched Beginning
- Turning the task in
|
Player: hi |
|||
Face Your Fears
- Turning the task in
|
Player: hi |
|||
Soothing Bad Dreams
|
Player: hi |
|||
Mend What's Broken
- Turning the mission in
|
Player: hi |
|||
Not Afraid Of The Dark
- Obtaining the task
|
Player: hi |
|||
- Turning the task in
|
Player: hi |
|||