Legend
Investigate mysterious locations around Tibia and dive into the history of the Planegazers.
Location
Ab'Dendriel, Horestis Tomb, Venore, Fiehonja, Gnomebase Alpha, Dwarf Mines, Otherworld (Dwarf Bridge), Krailos, Replica Dungeon, Gnome Deep Hub and The Cube (Location).
Dangers
Deeplings, Wigglers, Instable Breach Broods, Instable Sparkions, Clomps, Ogre Shamans, Ogre Brutes, Ogre Savages, Iron Servant Replicas, Golden Servant Replicas, Diamond Servant Replicas, An Observer Eye, Lava Lurkers, Glooth Anemones, Glooth Golems, Devourers, Rustheap Golems, Humongous Fungus, Hideous Fungus, Ghosts of Planegazers, Reflection of a Mage, Reflection of Mawhawk, Reflection of Obujos, Last Planegazer, Planedwellers and the Planestrider.
Reward
Mysterious Metal Egg, Lightsphere, The Supreme Cube, a Monolith of the Planes and the Planegazer Title.
History
This quest has been slowly implemented in the course of several updates. Hence, even though it was initially released with The First Part of the Summer Update 2013, different parts of it were released over the course of many years. The last known content related to it was released in April 2020. During the Test Server for the Summer Update 2021, CipSoft Content Team member and creator of this quest, Lionet, said the following:
- The arc around the Planestrider is already complete, everything necessary for this has already been implemented. However, the Planestrider and Planegazers both affected the world in several ways and their history matters of course. Players are bound to discover things related to their legacy here and there, now and then. Remember that the Planestrider has shown a form and was shaped by things, but it may just as well be one of many different interpretations of the concept.
(settings)
Required Equipment[]
- Rope
- Shovel
- Pick (Will be lost and can't be one of the secret agent tools)
- Access to Gnomebase Alpha (rank 2 of Bigfoot's Burden Quest)
- At least stage 2 of the Deeplings World Change opened on your server
Method[]
Obtaining Sphere[]

Go to northern Ab'Dendriel, south of the fruit store, here, open the hole with a shovel and go down.
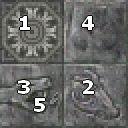
To the west is a walled chamber with no visible entrance. To open it, use/light the northern torch bearer (I) and then use the southern torch bearer (II).
Note: the door may close while you are inside. To open from the inside, use the southern torch bearer again (II).
You will see a collection of books and crates. Use the Crate (Heavy) (on the bottom of a stack of crates) to find an Opticording Sphere.
Gather visions[]
You now must go all around Tibia and find strange symbols engraved in certain places. Once found, use the Opticording Sphere at the spot. The engravings must be decoded using binary to ASCII text conversion in order to reveal their true message. If you stand on the correct spot when using the sphere a message will appear: "Suddenly, the opticording sphere emits an extremely bright light. It seems something inside the sphere has changed.". If you are on the wrong spot the following message appears instead: "Nothing happens except... no, absolutely nothing is happening at all."
The following is all the data you will need (the order in which you go to these locations doesn't matter, but you need to remember which order you did them for the next stage of the quest):
| Entrance to the Prison and Garrison | Roof of Paupers Palace | Roof of Crunor's Finest Warehouse |

Note1: To get to the roof of the prison, get to the upper floor and you will find a levitation spot between the first and second column of beds.
Note2: To get the vision of the Paupers Palace roof, you need to stand in the location shown in the map, at street level, you will be able to see the strange carving on the roof.
- Gnomebase - Ferumbras
- Go to the Mushroom Farms, and use the Sphere near the Strange Symbols (Mushroom Gardens).

- Gray Island - Qjell
- Go to the main Fiehonja library (Stage 2 or 3 of the Deeplings World Change required, lvl 120+ recommended) and use the Sphere (Deepling ornament is on the floor).
- Ankrahmun - Zoralurk
- Go to Horestis Tomb, first floor underground and use the Sphere (Hieroglyphs are on the walls and pillars).

- Ab'Dendriel - Garsharak
- Go to the temple and use the Sphere (symbols are on the Strangely Shaped Menhir).
The translation of the symbols to visions is as follows.
Venore
The first strange symbols tile contains the following binary code:
01010110
01100101
01101110
01101111
01110010
01100101
Every sequence of 8 bits can be translated to a text symbol in the UTF-8 character set, e.g. using this website which results in the text: Venore.
The second strange symbols tile contains the following binary code:
00110000
01100011
00110000
00110100
00110001
01100001
00110000
00110111
Every sequence of 8 bits can be translated to a text symbol in the UTF-8 character set, e.g. using this website which results in the text: 0c041a07, which is still in hexadecimal format.
The third strange symbols tile contains the following binary code:
00110000
00110000
00110000
01100001
00110010
00110010
00110000
01100100
Every sequence of 8 bits can be translated to a text symbol in the UTF-8 character set, e.g. using this website which results in the text: 000a220d, which is still in hexadecimal format.
If you take the hexadecimal result from the second and third tile and put a space after every second character you get the following hexadecimal sequence of characters: 0c 04 1a 07 00 0a 22 0d. Converting every hexadecimal character to binary results in:
0c = 00001100
04 = 00000100
1a = 00011010
07 = 00000111
00 = 00000000
0a = 00001010
22 = 00100010
0d = 00001101
The next step consists in applying XOR to the 8 sequences above, using the corresponding line of the Venore sequences as the key. Since Venore only has 6 letters, you need to use the first 2 sequences for the 7th and 8th sequences of the encrypted word:
00001100 XOR 01010110 (V) = 01011010
00000100 XOR 01100101 (e) = 01100001
00011010 XOR 01101110 (n) = 01110100
00000111 XOR 01101111 (o) = 01101000
00000000 XOR 01110010 (r) = 01110010
00001010 XOR 01100101 (e) = 01101111
00100010 XOR 01010110 (V) = 01110100
00001101 XOR 01100101 (e) = 01101000
Finally, you convert this binary sequences into Wikipedia:ASCII characters, for example using this website, and you get Zathroth.
Gnomebase
The Strange Symbols (Mushroom Gardens) contains the following binary code:
01010010
01011010
01010001
01000001
01001100
01010100
01010001
01000100
01000101
Every sequence of 8 bits can be translated to a text symbol in the UTF-8 character set, e.g. using this website which results in the text: RZQALTQDE. Replacing each letter with the one following it in the alphabet (A becomes B, B becomes C and so forth) one obtains: SARBMUREF. By reversing the result one obtains: FERUMBRAS, which is Ferumbras.
Gray Island
There is some tile which contains the following binary code:
01010001
01001010
00101101
00101000
00101000
Every sequence of 8 bits can be translated to a text symbol in the UTF-8 character set, e.g. using this website which results in the text: QJ-(( (another name for Qjell, god of the Deeplings).
Ab'Dendriel
The message is hidden on a Strangely Shaped Menhir at Ab'Dendriel's temple, here. The fact that there is a message hidden here is described in Tassondis's Discoveries (Book), which is located at Oramond's Forge.
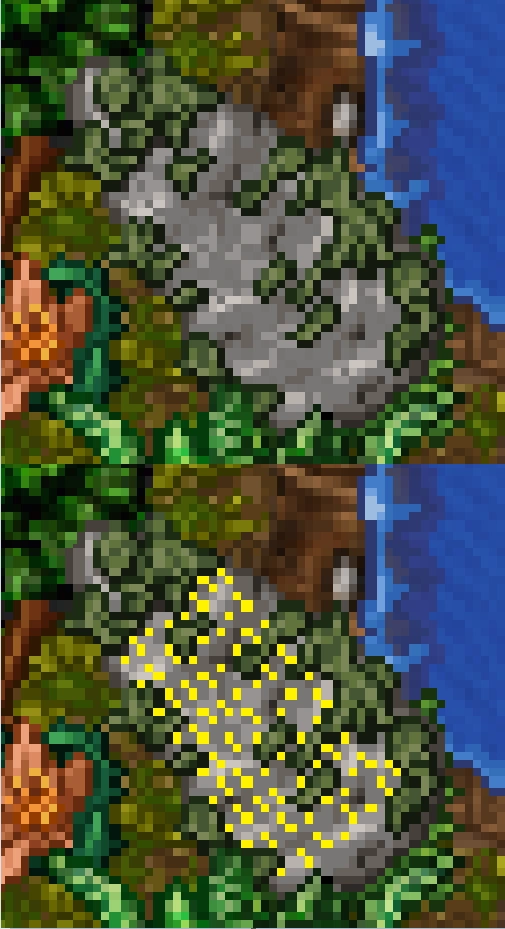
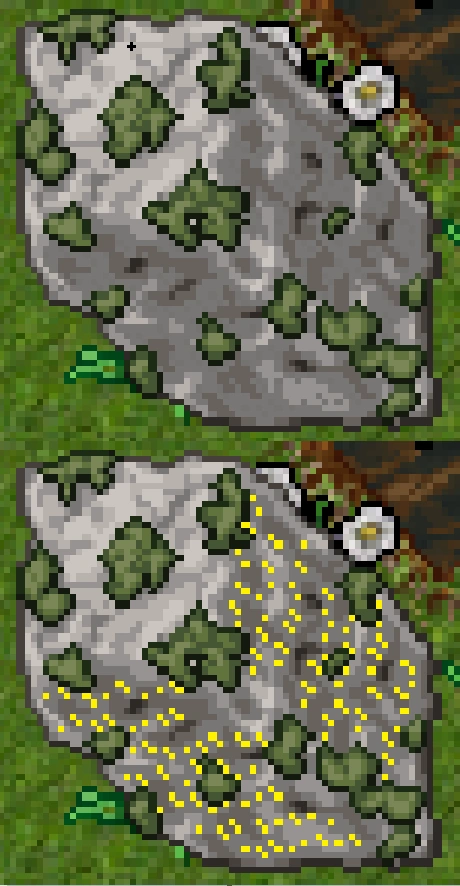
In order to decode this, you must take a screenshot of the while having the Antialising graphics setting disabled on the client, 100% ambient light and no light source equipped. Casting Great Light is recommended. Paste this screenshot on Paint Brush and look for some isolated gray pixels with a different color. Then, use the color picker to select this color and set the second color on paint brush to a very strong color, e.g. yellow. Select the eraser and right-click and drag the cursor the image. If you done everything correctly, the code should be much easier to visualize in the color you picked, like the image shown here. These dots, in binary, correspond to
01000111
01100001
01110010
01110011
01101000
01100001
01110010
01100001
01101011
Translating into text in the UTF-8 character-set results in Garsharak.
Ankrahmun
There are Hieroglyphs which contain the following binary code:
01011010
01001111
01010010
01000001
01001100
01010101
01010010
01001011
Every sequence of 8 bits can be translated to a text symbol in the UTF-8 character set, e.g. using this website which results in the text: ZORALURK, which is Zoralurk.
Five Walls of Testimony[]
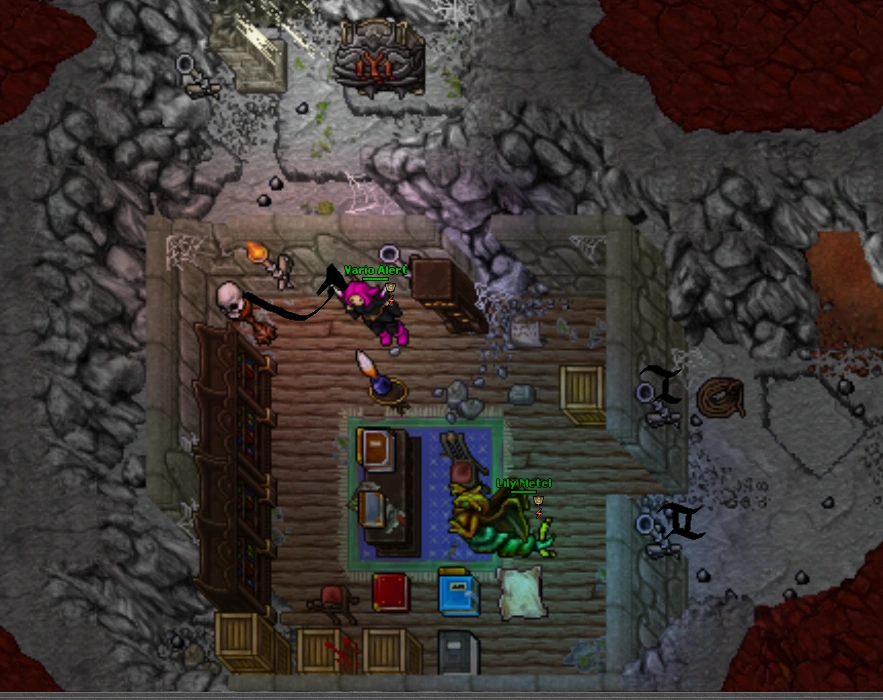
Now that you have all 5 visions, you can begin with the NPC dialog. Go back to the Ab'Dendriel Forge. Use the skull to the west to open the path to the NPC Mysterious Ornate Chest (NPC).
Say to the NPC (the order may differ depending on the order in which you acquired visions):
- hi - Zoralurk
- hi - Ferumbras
- hi - Garsharak
- hi - Zathroth
- hi - QJ-((
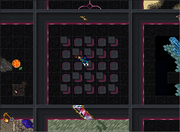
You will now be asked the meaning of the five walls of testimony. Leave the room (light the torches and use the torch west of the chest if you get trapped) and travel to the Dwarf Mines in the surface west of Kazordoon. Go down into the southern mine entrance, here, then follow the path to the right and go down the hole, as if you were going to the Sunken Mines. Walk south into the flooded tunnels, then continue east until you find another room with a blocked entrance.
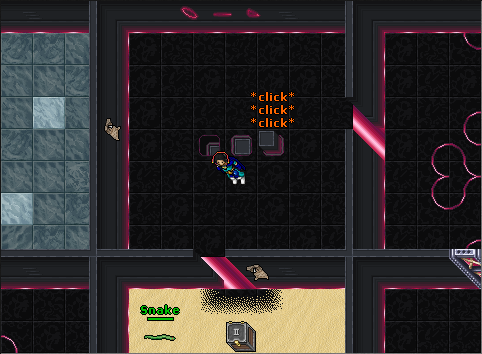
In order to enter the room, you must walk the tiles in a specific order, walking diagonally.
Note: If the door closes while you are inside, use the torch bearer south of the Chalk Board to open it again.
Inside the room you will find Opticorder Forge (NPC) and a Strangely Shaped Block to the east. Again, to obtain the keywords, it was necessary to convert binary symbols visible on the two walls of the block to ASCII text. The method to decode this is the same used on the Strangely Shaped Menhir in Ab'Dendriel's temple, explained above.
These dots, in binary, correspond to
01101001 01110011 01101111 01101100 01100001 01110100 01100101
01100100 01100011 01110010 01100001 01100100 01101100 01100101
Translating into ASCII characters you'll get isolated cradle, which is the keyword you must say to the NPC. After doing so, use the Opticorder Forge object.
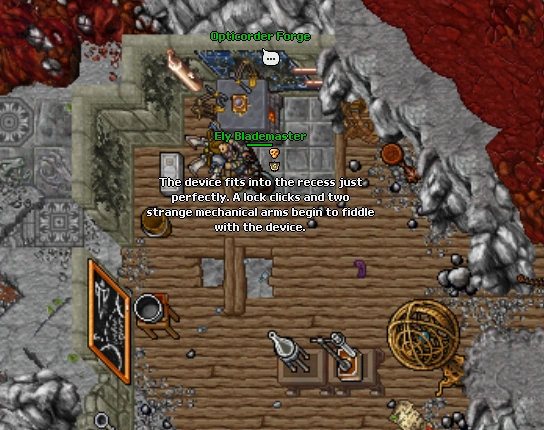

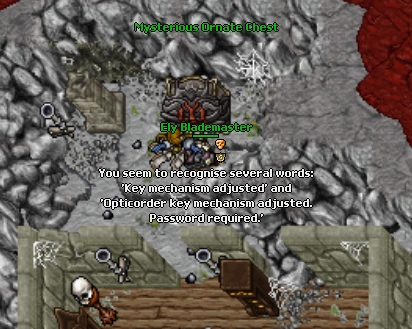
Now, when you use your Opticording Sphere, it will give you the following message: You seem to recognise several words: 'Key mechanism adjusted' and 'Opticorder key mechanism adjusted. Password required.'
After this, travel back to the Ab'Dendriel Forge and tell the keyword marionettes to Mysterious Ornate Chest (NPC) (this comes from the text shown when you use the sphere after gathering all visions: The sphere shows a faint glow. You seem to recognise several words: "Manipulated from above, dancing on a string."). Doing this will unlock the chest and allow you to use it. Note: You might have to use the chest first for it to sync properly before speaking to the NPC.

You will receive a Mysterious Metal Egg. This egg can be opened to reveal an Opticompass Sphere and a Rolled-up Parchment. If you use the Opticompass Sphere you will receive the message The needle spins inside the compass.
Wrecked Opticorder Forge[]
Go to the Otherworld (Dwarf Bridge) which can be entered here and kill 10 creatures inside the cave and enter the Glowing Vortex located here. If the hole isn't there you'll have to wait a few minutes. You don't need to wait 2 hours like the Vortexes from HoD.
Walk to the south here and look for a Strange Stone (this stone seems strangely fragile). Here you need to throw any item on the Strange Stone to open a hole to the lower floor.
Throw any of those items on the strange stone and a Hole will appear. Go down the hole, here. You will see a Wrecked Opticorder Forge, click on it to obtain a Broken Opticording Sphere (A broken opticording sphere lies just beneath the forge. Apart from a shattered shell, its mechanisms are in perfect condition.). Use the Broken Opticording Sphere on your Opticording Sphere to obtain a Complete Opticording Sphere (do it right away because the Broken Opticording Sphere disappears after one minute).
![]() +
+ ![]() =
= ![]()
A message will appear: "The Key mechanism from the broken device is still in perfect condition and completes your opticording sphere."
Opticompass Sphere Part II[]
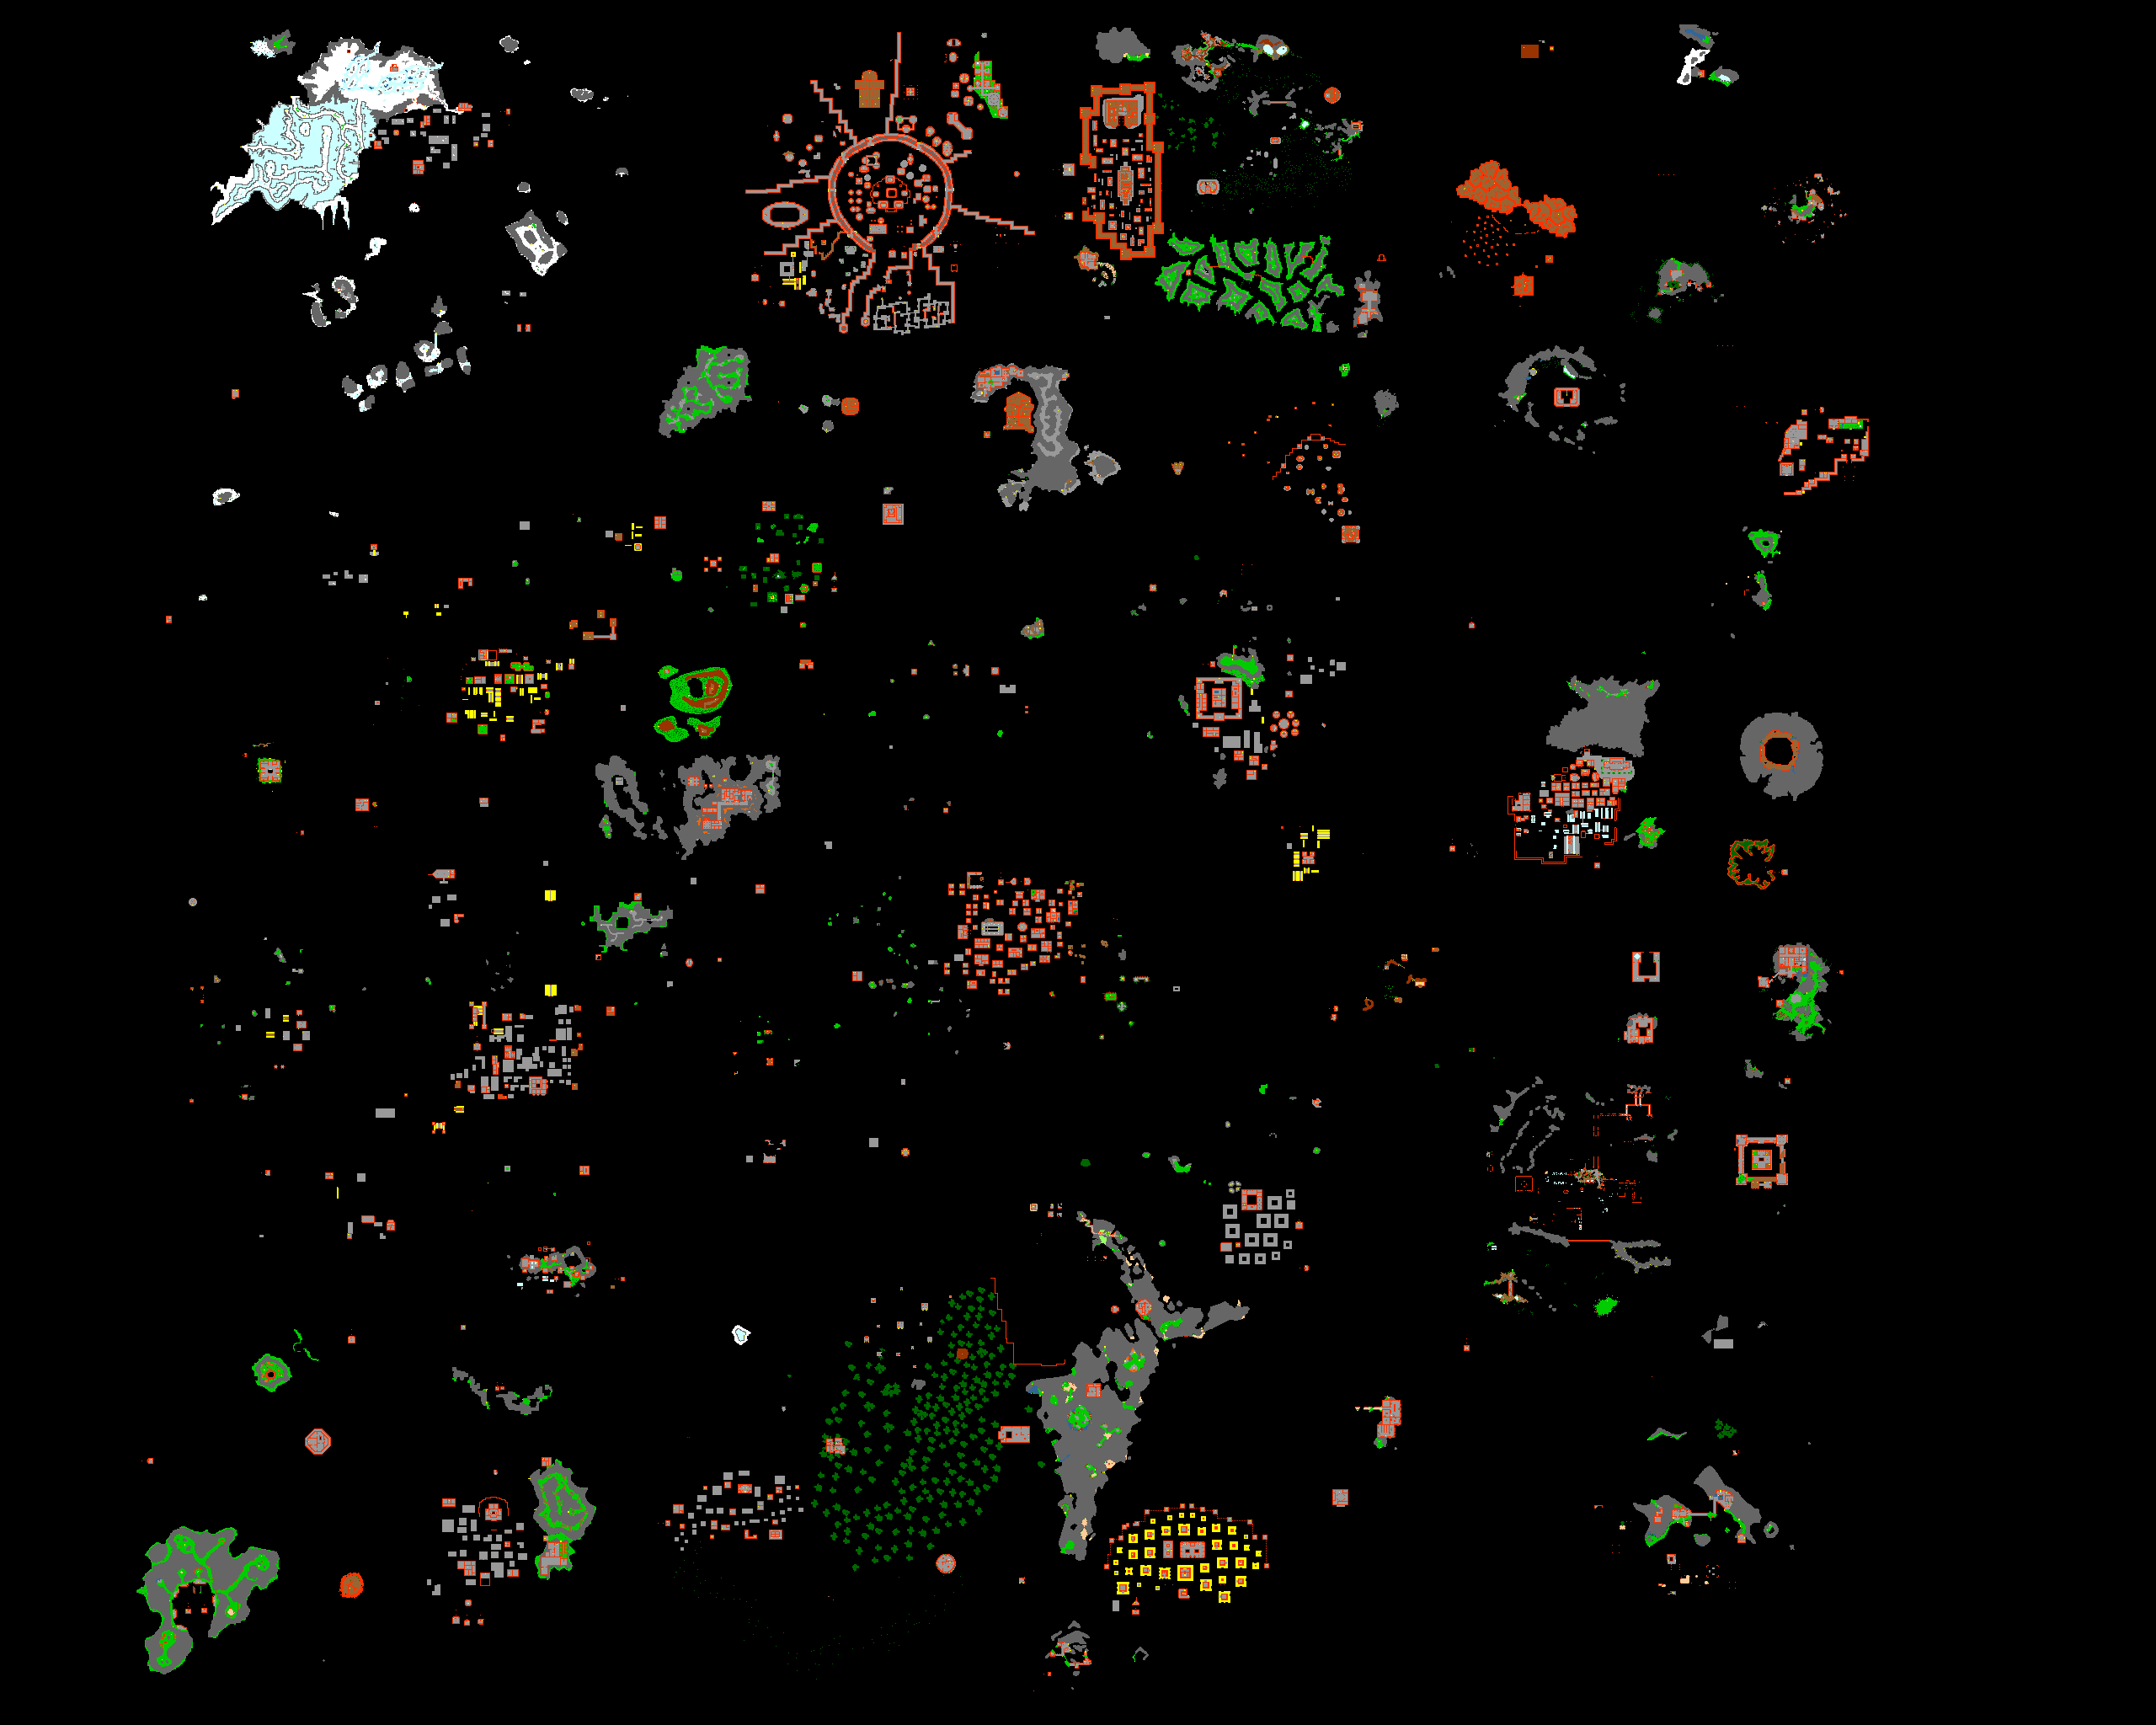
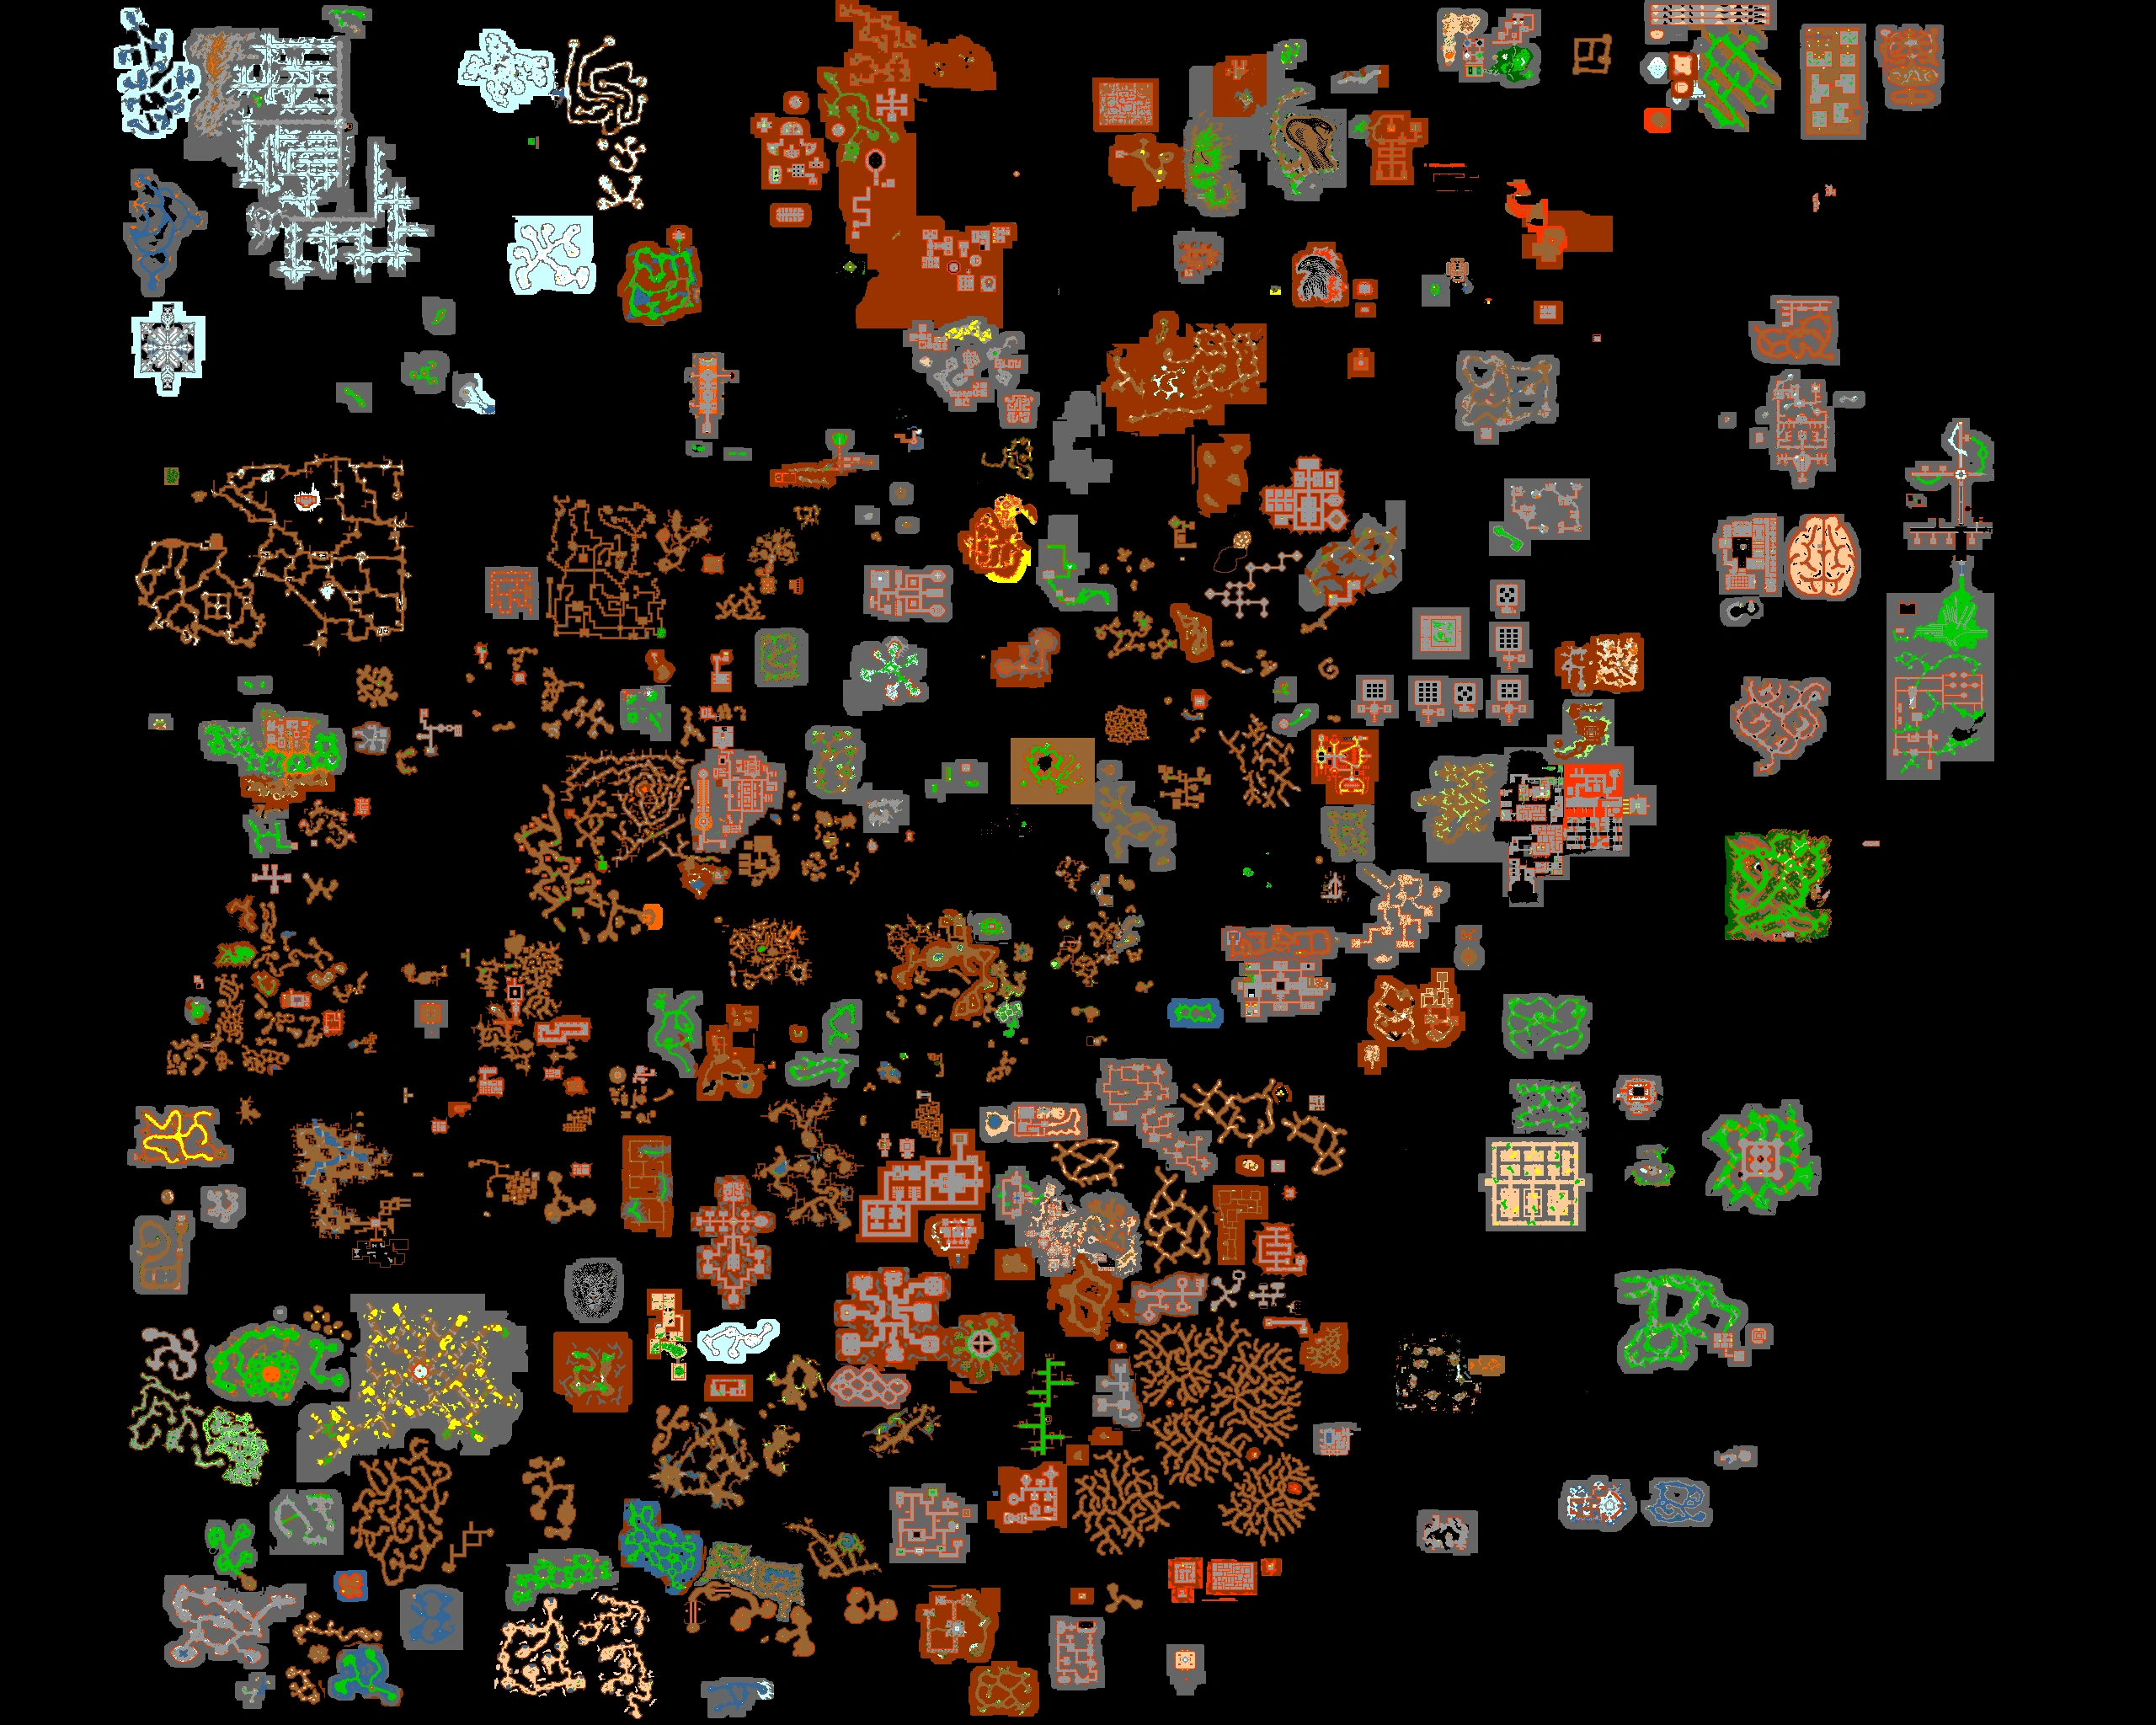
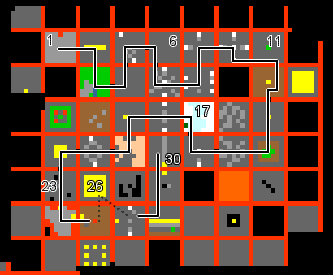
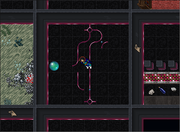
Now you have to travel to Krailos, where using the sphere will lead you east from town, to a place with dragon bones. Use a pick on the tile north of the Pile of Bones, here to go into a small cave. The northwest area contains a color puzzle and a corridor behind a stone door. If you remove all light-emitting objects on your character you will see the tiles change colours (Blue - Red - Yellow) as you step on them. Also, in the minimap you will see a certain black dots and lines in a hallway, which is, again, binary code.
The binary code from the Rolled-up Parchment in the egg is °°°°°'''''°'''°° = 0000011111011100 = 2012 in decimal.
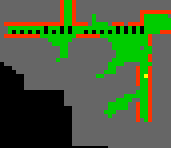
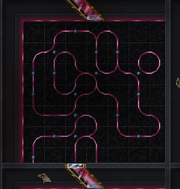
The binary code from the minimap (as shown to the right) in the cave is: 00001011 and 00001111 = 11 and 15 in decimal.
Based on this, we have a date: 15/11/12.
Check the Tibia news archive for this date and you should find a teaser concerned with the latest revamp of Venore. Open the first animated gif image you come across and you should notice a flashing frame that is very hard to see. Once you manage to freeze that frame, it will show a 5x5 color pattern made with blue, red, and yellow flowers. This is the answer to the color puzzle. The easiest way is to start at the south and then work to the north. Remember that the tiles have a timer and will be switched into default tiles after waiting for too long, so you got to hurry a bit. When you complete the puzzle will you get teleported into the room ("Before you get a chance to react, you find yourself at the other side of a solid wall in the midst of a dark tunnel."). If you want to enter the room again after exiting, you don't have to do the entire puzzle again: just use the Stone Wall (Draft) that is adjacent to the hallway.
")
")
Once inside you will find an Opticorder Analyser. Click on the Analyser, having in your Backpack the Complete Opticording Sphere. You will recieve the message "The device fits. A lock clicks, the strange thing starts rumbling and then grinds to a halt faster than you can say 'magic'." and the Analyser would turn into Opticorder Analyser (Activated).
An Observer Eye[]
Note: For those only wishing to obtain The Supreme Cube item, this part of the quest is not necessary and you can just skip it and move to the next part.
Note: You will need a melee weapon during this mission, don't forget to bring one! You should also bring your Opticording Sphere since it's most likely required, even though this was not tested yet.

This part takes place on the Halls of Hope, and can only be done by a team of 2 players. For instructions on how to gain access to the gates, check the Forgotten Knowledge Quest. Go into the Energy Portal and go to the center of the room, here. To pass the wall, you need a password, which is PLNSTRDR. Say it in the Local Chat or NPCs Channel and you'll be teleported to another room one floor down.
The position of the pins represent binary code that reveal the password.
01010000
01001100
01001110
01010011
01010100
01010010
01000100
01010010
Using the same website as before, this can be converted into text to find the password PLNSTRDR.

Opticording Sphere Quest - An Observer Eye
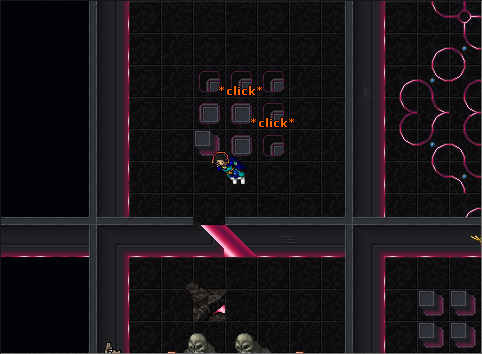
In order to get to the next room, you'll need to pull a lever. To reach the lever, one player must enter the door to the west (with the water) and step on the Embedded Emerald floor while the other enters the east door (the control chamber) and steps on the Embedded Topaz floor. In order to move through the platforms, the player in control chamber must make movements on the ornamented floor, including diagonals. The movements made by this player will be reflected on the player on the other side. The platforms will sink and rise randomly, so the player giving the commands must pay attention to their movements. It's possible to stand on a Platform Rising From Water and on a Platform Sinking Into Water, but you'll fall into the water if you step on a Platform Under Water (You slip and fall right into shark infested waters but somehow you manage to escape their razor-sharp teeth. Lucky!). This way, one character must guide the other without letting him fall into the water. If this happens, the character moving on the platforms will be sent outside of the room. You have 5 minutes to do this before being teleported out, but you can try it again as many times as you need.
")
")
As soon as the lever is pulled, both players will be teleported to the room with An Observer Eye.
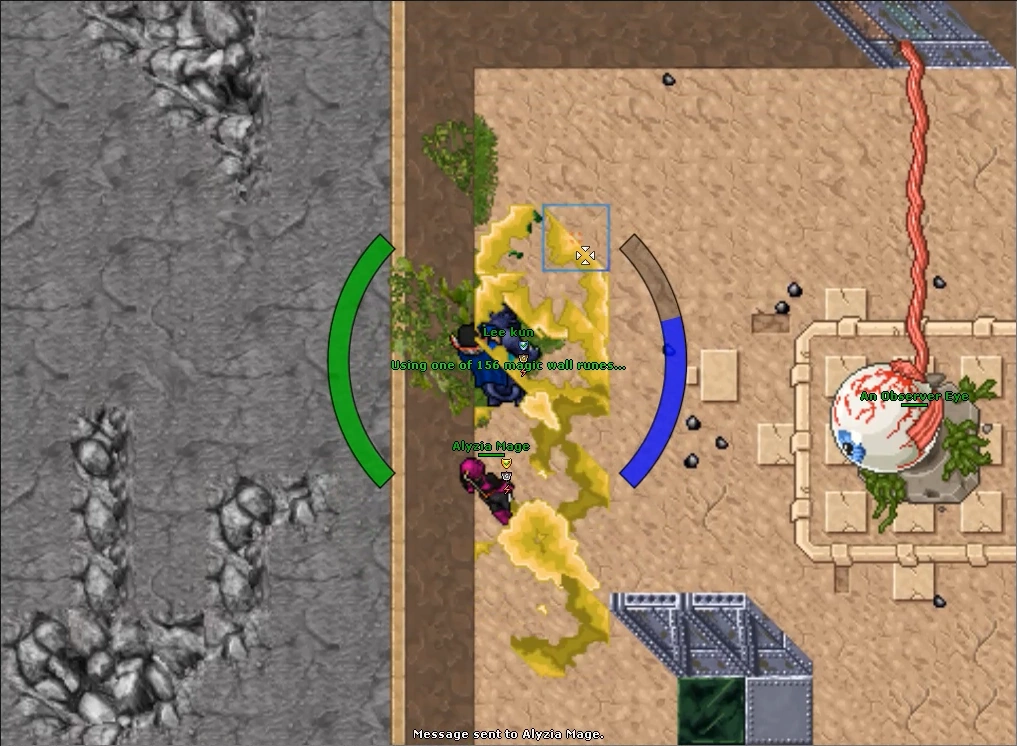
Be careful: An Observer Eye deals a lot of damage and you shouldn't fight it just yet. First, you need to cut the cord that powers it. To do so, move around the room slowly, protecting yourself from the eye using Magic Walls. After reaching the end of the room, use a melee weapon to break the wall. When inside, use the Opticording Analyzer, a sphere will appear on top of it and the cord will be cut. You can now kill An Observer Eye, but do not get close to it since its beam spell hits up to 99% of a player's total hitpoints (a team with 2 knights probably won't be able to kill it in time). Stand on the row of tiles next to the northern wall and don't walk south. Special Summons are also not recommended because they can get close to An Observer Eye, triggering its beam attack.
After killing An Observer Eye you will loot a Lightsphere. Currently its use is not known. Be careful when leaving, you'll be sent to a room with 5 or more servants.
Dolis - The Last Planegazer[]

A new site was discovered under the Gnome Deep Hub. You can access it by entering the Gnomus' tasks area and then going to the Lost Ruin, here. There will be one Skull Pillar and one Pillar Vine. Use them once each to be sent to the forge.
Inside the forge, you'll find an Opticorder Rectifier and Blue Spectacles ![]() inside a chest just next to it. You can also read about the experiences of one the planegazers in Lone Gatekeeper (Book). Now you have to use the Blue Spectacles in each one of the sites to have a glimpse of a ghost.
inside a chest just next to it. You can also read about the experiences of one the planegazers in Lone Gatekeeper (Book). Now you have to use the Blue Spectacles in each one of the sites to have a glimpse of a ghost.
Go to all the Sites and use the Spectacles in them to see their respective ghosts:
- In the Gnome Deep Hub, where you acquired them, use them near the crops;
- In Ab'Dendriel, here;
- Near the Sunken Mines, here;
- In the Rathleton Sewers, below a sewer grate, you'll find a room. To reach it go down here, then here, and finally down the grate here;
- On Krailos, here;
After using the Blue Spectacles inside all Sites, go back to the one in the Gnome Deep Hub. You will now be able to use the Opticorder Rectifier while holding a Complete Opticording Sphere in your backpack, and an Energy Gate will appear. Enter it to access the Headquarters of the Planegazers.
The very moment you place the opticorder into the rectifier a beam of light emerges to create a gate directly across the room.

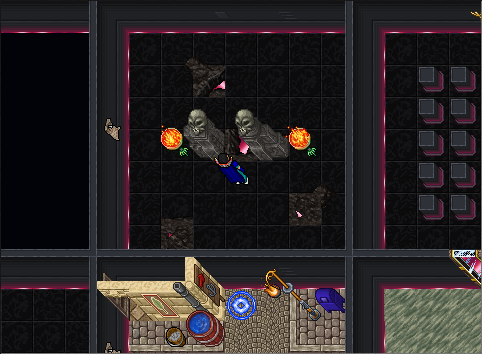
You will find many Ghosts of Planegazers here. They are very hard to kill alone and don't pose much of a threat, so don't bother trying to kill them. They will attack you from a distance but you can keep them away using Fire Bombs and Fire Walls. You now must gather 3 Vocal Keys to be able to enter the Chamber of Reflections. Find the 3 NPCs to the south-east, marked the map: Yielothax, Glimpse of Allusion and WOX. You must greet them using the known password PLNSTRDR.
- The Yielothax, will give you a riddle: ...THE THING ... WAS ASKED EIGHT AND SHAPED FIVE WITH HIS MOUTH... THE THING WAS THEN ASKED SIXTEEN AND SHAPED SEVEN... I ASK YOU SEVEN. The answer is the number of characters in the word: eight has five characters, sixteen has seven characters, and seven has five characters as well, which is the answer;
- The Glimpse of Allusion will ask you a series of questions about an Edron traveller. The answers can be found in a room on the northern part of the map, called The Travelling Savant (Book). The correct answers you must say are: Fiehonja, Tin Key and Food Crate.
- Finally, you must talk to WOX using Jekhr, the Deeplings' language. He will ask JEH GOUTHN JARKH. UM DIVIDE J. UT JE JUL KU LH. GONN EN NA? (The surface come in peace. And we let him stay. What are you?). Tell him you are Buhel, a visitor. (This dialog can also be found in a book in the Fiehonja Library).
After talking to the 3 NPCs and gathering their Vocal Keys, you can access the Chamber of Reflections. You can enter the chamber with a team of up to 5 players. Once inside, you have to kill 5 bosses, one by one:
The reflections are very similar to their real counterparts. The Last Planegazer is similar in strength to the Reflection of Obujos and can be attacked with all elements but Death Damage. The blocker can trap it in one of the small corridors to the north so it doesn't retarget on the shooters.
The Last Planegazer drops The Cube ![]() . This fight can be repeated every 7 days and you'll always loot a new Cube from it. Note: There is a 10-minute time limit until you get kicked from the boss room.
. This fight can be repeated every 7 days and you'll always loot a new Cube from it. Note: There is a 10-minute time limit until you get kicked from the boss room.
The Supreme Cube[]
Missing Piece of the Cube[]
The Cube obtained from the Last Planegazer is not complete. You can find The Missing Piece of the Cube down a small Crypt north of Edron.
")
Forge the Supreme Cube[]
With your ![]() Complete Opticording Sphere,
Complete Opticording Sphere, ![]() The Cube, and
The Cube, and ![]() The Missing Piece of the Cube, travel to Gray Island and go down the hole all the way to the east, here. Down the hole you'll find a small platform near the water here. Step on it to access the final Opticording Forge. Use the three items on the Opticording Combinator north of you, and then use the machine to combine then into
The Missing Piece of the Cube, travel to Gray Island and go down the hole all the way to the east, here. Down the hole you'll find a small platform near the water here. Step on it to access the final Opticording Forge. Use the three items on the Opticording Combinator north of you, and then use the machine to combine then into ![]() The Supreme Cube.
The Supreme Cube.
Note: The Supreme Cube can be forged without having to kill An Observer Eye nor the Last Planegazer if you can get the required items from another character. You can also forge multiple Cubes. Cooldowns for obtaining The Missing Piece of the Cube and Opticording Sphere are 24 hours.
Into the Supreme Cube[]
Note: It's a good idea to bring one or two regular Picks with you, having an extra pick can save you some precious time if you make a mistake in some of the puzzles.
With The Supreme Cube in hand, you can now travel inside the Cube. To do that, just use The Supreme Cube anywhere you are, as long as you don't have a Battle Sign.
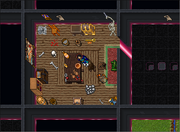
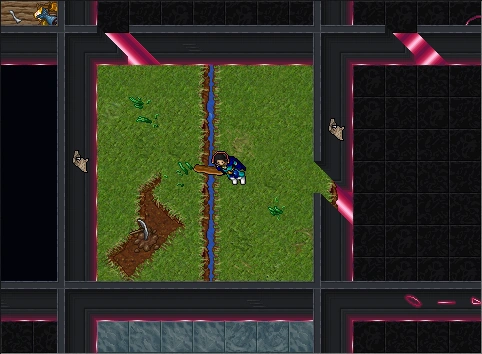
Be careful! Upon using the cube, you'll be sent to a room with 4 Planedwellers that can deal more than 1000 damage each. Here you'll have to survive their attack for 15 seconds in order to be teleported to the first puzzle room. If you're alone you can trap yourself to the south-west to be safer, as shown below.

Now that you're inside the Supreme Cube, you'll have to go through several rooms, each one with a puzzle, to proceed to the final boss fight.
If you decide to leave the cube, you can use twice the symbols on the walls northeast of any puzzle room; alternatively you can use the cube once again. Note that there's a 2-hour cooldown between each time using The Supreme Cube.
Room 1

Inside this room you'll take several items, some of which will be needed during the Puzzles:
- Rope from the Skeleton;
- Wooden Plank from the Heap of Rubbish.
- Old Fanfare from the Ashes.
- Old Lute from the Brass-Shod Chest.
- Bucket Filled with Gravel from the box.
- Blue Spectacles from the Bookcase.
- Parchment from the book.
The Rope, the Plank of Wood and the Fanfare are essential to complete all puzzles. The other items seem to be there just as flavor and to confuse you. Each item has a 20 minutes cooldown to be obtained again.
Room 2
To proceed through this room, just push the rightmost button. A door will open to the south.
Room 3
First, use the buried Pick on the grass to obtain a Pick. You'll need it later, and the cooldown to take another one from this place is 60 minutes.
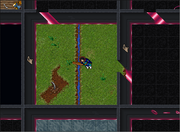
Use the Plank of Wood on the stream of water to create a small bridge and walk through to the next room.
Room 4
Nothing to do here, just go north.
Room 5

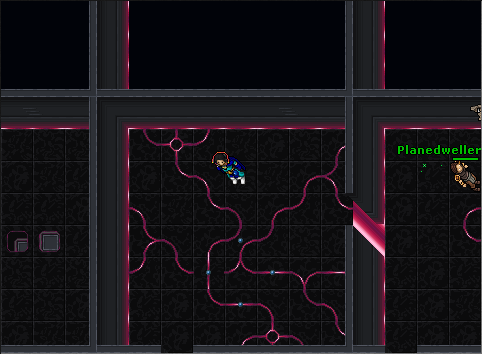
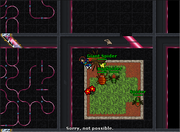
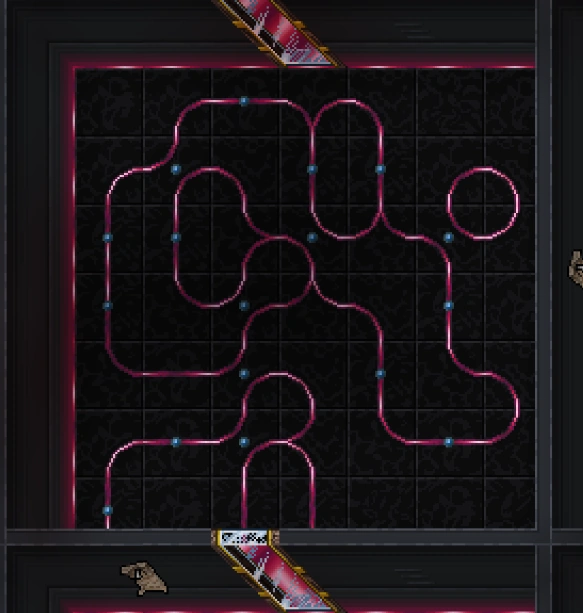
In this room, you'll have to move the "pipes" on the floor to change their positions. Your objective is to connect the circles on the north and south of the room using the pipes. When you get it right, the passage will appear to the east.
Room 6
In this room there will be some Planedwellers. If you are with a team, or at least 2 players, you should take the opportunity to kill them. To make them weaker, use the Old Fanfare on them. Even when weakened they heal very quickly, which is why it's advisable to not do it solo. You have to loot 9 different Marbles from them (each one has a different number when looked at). Ideally, you will want one set for each player of the team, though it is possible to complete everything with just two sets.
After killing or ignoring the Planedwellers, go to the south.
Room 7
Once again, move the pipes on the floor to connect the three circles them and open the passage.
Room 8
Again, move the pipes. Use the three pipes at the center and the one to the right to open the passage.
Room 9
One more time: move the pipes to open the passage.
Room 10
Move the pipes to open the passage.
Room 11

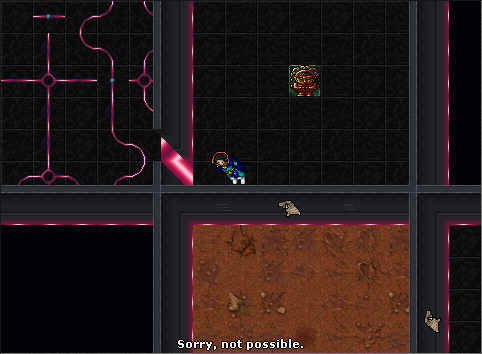
After opening the passage to this room, enter it and stand still in front of the passage (not on it). Wait a few seconds and the passage on the south wall will open, allowing you to proceed. If you walk around in this room you will get kicked out.
Room 12
Use the Rope or a Secret Agent tool on the rope spot to open the passage to the south.
Room 13
Press the single button here and then go south.
Room 14

The room contains a single Giant Spider (Nostalgia), single a Bug (Nostalgia), and two Spiders (Nostalgia). Kill only the Bug (Nostalgia) and proceed to the west.
Room 15
Again: move the pipes to open the passage. This time, the goal is to make this room be a mirror image of the room to the north.
Room 16
Move the pipes to open the passage.
Room 17
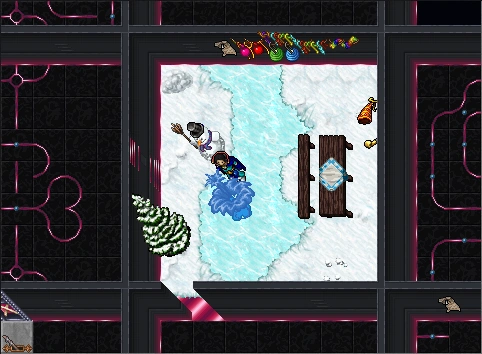
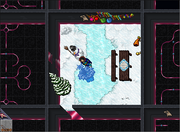
Use the Pick on the Ice (not on the snow) to open the passage. Beware that the pick will disappear, which is why it may be a good idea to bring more Picks from the outside in case you have to start over.
Room 18
Again, connect the pipes.
Room 19

In here you'll find 3 buttons. Their correct position is displayed on the wall to the north:
Down -- Middle -- Up
Room 20
Inside this room, ignore the depot locker. Just dig around until the passage opens to the west. You can kill the Snakes if you need to.
Room 21
Use the pipe connections on the left side of the room to connect the circles.
Room 22
There are nine buttons here. As the note on the wall says, you must press them to have
- Five buttons pressed down;
- Two buttons half-pressed;
- One button up.
Room 23

In this room, you have to walk between the two Stone Pillars while both Fire Basins are lit. It may take some time until they synchronize, but be patient. If you walk in without them being lit, you'll be sent to the beginning.
Room 24

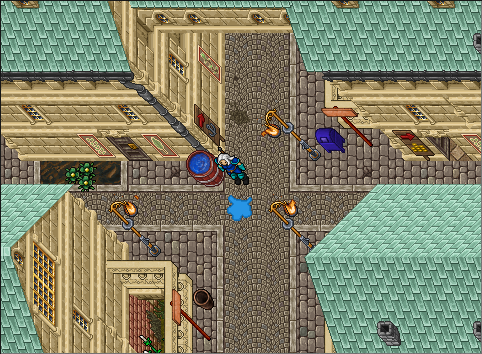
To get past this room you'll have to leave the Cube. You can do that by using the wall behind the northern Street Lamp twice. You'll be sent to the forge. Travel to Venore and go to the crossroads just south of the boat, which looks the same as the Cube room you were at. Use any liquid container to pour water on the tile south-east of the rain barrel, as shown to the right.
Note: It won't work if you try to do this before visiting the room for the first time, so you'll have to enter the first time before pouring the water on Venore.
Now you have to return to the Cube, however, there's a 2 hours cooldown for using The Supreme Cube again. so you may have to wait that.
If you did the (real) Venore part correctly, you should see a Water Splash effect when you enter this room again. If you don't see this effect you'll have to leave the Cube and go to Venore try again. With the access complete, just enter the teleport to the right.
Room 25
Here, talk to the Deepling Idol. You have to say the sentence written on the note (Qjell watches over us) in Jekhr, which translates to QJ-(( ^=^B 8OC J-\.
Room 26

You'll be teleported to a room with several buttons north of the room you were in. You have to press the buttons so the unpressed buttons take the shape of the Symbol of Zathroth on the northern wall.
Room 27

For the last time, move the pipes to open the passage to the next puzzle.
Room 28

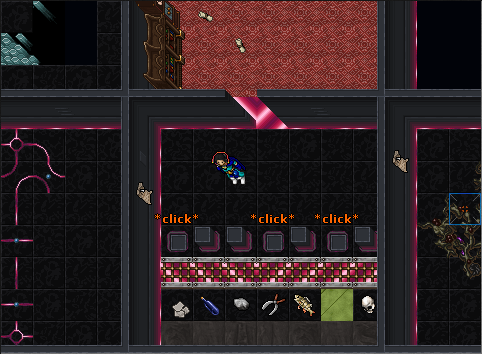
Here, press the 6th button (Sand), then the 4th button (Scissors) and the 1st button (Paper).
Room 29
To go through this room, you'll need one of each Marble type (I to IX) in your inventory. If your team has only two sets, one player can go in and out giving the second set so all members can get inside the room.
 Blue Marble (I)
- Green Marble (II)
- Red Marble (III)
- Onyx Marble (IV)
- Versicoloured Marble (V)
- Turquoise Marble (VI)
- Golden Marble (VII)
- Orange Marble (VIII)
- Psychedelic Marble (IX)
Room 30
This is the lever room. Up to 5 players can join the fight against the Planestrider.
Planestrider[]

Opticording Sphere Quest - Planestrider
You can fight Planestrider with up to 5 players. You have 10 minutes to defeat it before being sent back to The Cube's entrance. Note that once inside the boss room, there's no exit, you have to kill it or wait for the timeout.
This fights consists of attacking the boss while also solving a couple of Puzzles to deal massive damage to it. After some time in the fight, 3 Lost Ghosts of a Planegazer will appear. They are immune to all damage and you should just ignore them.
The Planestrider does not take a lot of damage and can only be attacked from distance, but still you should be able to deal a reasonable amount of damage to it over time. Inside the room there will be those same "pipes" and a valve. Align the pipes and wait until two of them turn yellow. Align them again and use the valve afterwards. Now a bigger area of pipes will turn yellow and players will be getting teleported to puzzle rooms randomly. After solving puzzles all pipes turn yellow for a moment and then return to their default color. Repeat the process.
There are three different puzzles, and any number of players can be sent to them. When you successfully complete a puzzle, Planestrider will take 5000 damage, which is the most important way to damage the boss.
Resist:
In this puzzle room there is only one button. Simply do nothing and resist, as the note on the wall suggests. After 15 seconds you will be teleported out.
Press all buttons:
In this puzzle with 8 buttons, you have to press all buttons twice. You can then leave the room using the triangle on the wall.
Make an X:
In here you'll find 25 buttons. Press once those necessary to make an "X" and then you can leave the room.
By doing the puzzle and attacking the boss you should easily kill it and be sent to the reward room.
Rewards[]
Inside the two Mysterious Ornate Chests, you'll get a Monolith of the Planes Kit and a Parchment. You can also talk to the Planestrider now to learn more about it.
To get the Planegazer title talk to the Planestrider (NPC):
- hi, no, yes, no, yes, yes, yes
Transcripts[]
Ab'Dendriel, at Mysterious Ornate Chest (NPC)
- Transcripts missing.
Dwarf Mines, at Opticorder Forge (NPC)
|
Player: hi |
|||
Ab'Dendriel, back to Mysterious Ornate Chest (NPC)
|
Player: hi |
|||
Dolis - The Last Planegazer[]
|
Player: PLNSTRDR |
|||
|
Player: PLNSTRDR |
|||
|
Player: PLNSTRDR |
|||
Planestrider - in the rewards room[]
|
Player: hi |
|||