(Depois do Update do Dia 23/02/2012 Não é mais possivel usar levitate.) |
|||
| (40 intermediate revisions by 14 users not shown) | |||
| Line 1: | Line 1: | ||
{{Spoiler| name=Blood Brothers Quest}} |
{{Spoiler| name=Blood Brothers Quest}} |
||
| + | == Requirements == |
||
| − | ==Required Equipment== |
||
| + | Mission 1, additional requirements for those who haven't completed {{Spoiler Section|The Inquisition Quest|Mission 3: Vampire Hunt}}: |
||
| + | * [[Garlic Necklace]] |
||
| + | * [[Special Flask (Holy Water)]] |
||
| + | * [[Bulb of Garlic]] |
||
| + | * [[Flour]] |
||
| + | Missions 2-10: |
||
| − | |||
| + | * [[Special Flask (Holy Water)]] |
||
| − | * You don't need to have any rank of [[The Inquisition Quest]]. In case you haven't started or done that Quest already, you need someone to buy some [[Special Flask|Holy water]] for you. |
||
| + | * [[Bulb of Garlic]] |
||
| − | * [[Special Flask|Holy water]] (2 flasks if you haven't completed mission 3 of [[The Inquisition Quest]]) |
||
| + | * [[Flour]] |
||
| − | * [[Bulb of Garlic]] (2 bulbs if you haven't completed mission 3 of [[The Inquisition Quest]]) |
||
| − | * [[Flour]] (2 flours if you haven't completed mission 3 of [[The Inquisition Quest]]) |
||
* [[Baking Tray]] |
* [[Baking Tray]] |
||
* [[Blessed Wooden Stake]] |
* [[Blessed Wooden Stake]] |
||
* [[Fire Bug]] |
* [[Fire Bug]] |
||
| + | * [[Vial of Blood]] |
||
| − | * [http://tibia.wikia.com/wiki/Garlic_Necklace Garlic Necklace] (Mission 1) |
||
| + | * At least one female character for mission 9 |
||
| − | * [[Vial]] of [[Blood]] |
||
| − | * Travel money |
||
==Method== |
==Method== |
||
| Line 21: | Line 24: | ||
=== Mission 01: Gaining Trust === |
=== Mission 01: Gaining Trust === |
||
| + | :'''Note:''' if you have completed {{Spoiler Section|The Inquisition Quest|Mission 3: Vampire Hunt}}, you will skip this mission and instead start at {{Spoiler Section|Blood Brothers Quest|Mission 02: Bad Eggs}}. |
||
| + | Wear a [[Garlic Necklace]] and talk to [[Julius]] in the [[Yalahar]] [[Trade Quarter]] ({{Mapper Coords|128.62|122.44|7|2|text=here}}). He will tell you that a [[Garlic Necklace]] is not enough proof that you are against the vampires, and will ask you to make [[Garlic Bread]]. Obtain [[Special Flask (Holy Water)|Holy Water]], [[Flour]] and a [[Bulb of Garlic]]; you can buy [[Special Flask (Holy Water)|Holy Water]] from [[Henricus]], obtain [[Bunch of Wheat]] from either [[Donald McRonald]] or by harvesting it and grind it into [[Flour]], and a [[Bulb of Garlic]] from either [[Brasith]] ([[Ab'Dendriel]]) or [[Jezzara]] ([[Ankrahmun]]). Now use the [[Flour]] on the [[Special Flask (Holy Water)|Holy Water]] to obtain a [[Lump of Holy Water Dough]] and then use the [[Lump of Holy Water Dough]] on the [[Bulb of Garlic]] to obtain a [[Lump of Garlic Dough]]. Use this on an [[Oven]] to make [[Garlic Bread]]; an oven can be found above [[Julius]]. When you have done this, eat it in front of [[Julius]] to prove yourself to him. |
||
| − | '''NOTE:''' If you have completely done the '''third mission - Vampire Hunt -''' of [[The Inquisition Quest]], you don't need to make this mission and you can skip to the second one. |
||
| − | |||
| − | Get a [[Garlic Necklace]] and wear it, then talk to [[Julius]]. He will say that it is not good enough proof you are against the vampires and will ask you to make a [[Bread (Garlic)|Garlic Bread]] by getting [[Special Flask|Holy Water]], [[Flour]] and a [[Bulb of Garlic]] and eat it when you are talking with him.<br /> |
||
| − | |||
| − | Location of NPC [[Julius]] ([[Trade Quarter]]): |
||
| − | |||
| − | [[Image:The_Bloodbrothers_Quest_Npc.jpg]] |
||
=== Mission 02: Bad Eggs === |
=== Mission 02: Bad Eggs === |
||
| + | [[Julius]] wants you to find possible vampire suspects by tricking the citizens of [[Yalahar]] into eating [[Garlic Cookie]]s and recording the names of those with suspicious reactions. To bake [[Garlic Cookie]]s, obtain [[Special Flask (Holy Water)|Holy Water]], a [[Bulb of Garlic]], [[Flour]] and a [[Baking Tray]]. Use the [[Flour]] on the [[Special Flask (Holy Water)|Holy Water]], then use the dough on the [[Bulb of Garlic]]. Next use this on the [[Baking Tray]] to obtain a [[Baking Tray (with Garlic Dough)]]. Finally, use tray on the [[Oven]] to bake 12 [[Garlic Cookie]]s (you only need '''5'''); you can find an [[Oven]] directly above [[Julius]]. |
||
| − | You need to make special garlic [[Cookie]]s to test NPCs that are suspected of being Vampires. |
||
| + | When you have the [[Garlic Cookie]]s, ask the citizens of [[Yalahar]] if they would like a [[Garlic Cookie]]. The NPCs you must ask are: |
||
| − | Get some [[Special Flask|Holy Water]], a [[Bulb of Garlic]], [[Flour]] and a [[Baking Tray]]. First use the [[Flour]] on the [[Special Flask|Holy Water]], then use the dough on the [[Bulb of Garlic]]. Next use this on the [[Baking Tray]] and then the tray on the [[Oven]] to make the [[Cookie]]s. You will make 12 [[Cookie]]s but you need just 5 so 1 player can make [[Cookie]]s enough for two. |
||
| + | * [[Serafin]] |
||
| + | *: Inner City ({{Mapper Coords|128.84|121.233|7|4|text=here}}) |
||
| + | * [[Lisander]] |
||
| + | *: Inner City ({{Mapper Coords|128.47|122.14|7|4|text=here}}) |
||
| + | * [[Ortheus]] |
||
| + | *: [[Magician Quarter]] ({{Mapper Coords|128.110|121.111|6|4|text=here}}) |
||
| + | * [[Maris]] |
||
| + | *: [[Foreigner Quarter]] ({{Mapper Coords|127.136|122.61|6|4|text=here}}) |
||
| + | * [[Armenius]] |
||
| + | *: [[Trade Quarter]] ({{Mapper Coords|128.91|122.93|7|4|text=here}}) |
||
| + | When you have confirmed the names of the [[Suspected Vampires|Suspected Vampire NPCs]], go back to [[Julius]] and report about your '''mission'''. |
||
| − | '''NOTE: an oven is one floor above the NPC Julius '''[[File:Oven.gif]]''' ''' |
||
| − | |||
| − | After this is done go and ask the NPCs if they would like a [[Cookie]], then report back to Julius. |
||
| − | |||
| − | Suspected Vampires: [[Serafin]], [[Lisander]], [[Ortheus]], [[Maris]], [[Armenius]] |
||
| − | |||
| − | |||
| − | '''NPC Locations''': |
||
| − | |||
| − | NPCs [[Serafin]] and [[Lisander]] ([[Yalahar|Yalahar City]]) - Both NPCs are in the Ground Floor:<br /> |
||
| − | [[Image:Npc bbq 3.jpg]] |
||
| − | |||
| − | NPC [[Ortheus]] ([[Magician Quarter]]) - Floor +1:<br /> |
||
| − | [[Image:Npc4.jpg]] |
||
| − | |||
| − | NPC [[Maris]] ([[Foreigner Quarter]]) - Floor +1:<br /> |
||
| − | [[Image:Npc bbq 2a.jpg]] |
||
| − | |||
| − | NPC [[Armenius]] ([[Trade Quarter]]) - Ground Floor:<br /> |
||
| − | [[Image:Npc_bbq.jpg]] |
||
| − | |||
| − | You need to confirm the names of the [[Suspected Vampires|Suspected Vampire NPCs]]. Once this is done, you may ask for another mission. |
||
=== Mission 03: His True Face === |
=== Mission 03: His True Face === |
||
| + | [[Julius]] wants you to cast the spell "''alori mort''" on the [[Suspected Vampires|Suspected Vampire NPCs]]. Say '''hi''', and while facing them directly say the spell. You need only go to [[Armenius]], the head vampire. There's a small chance that [[Armenius]] show you his true face, and will teleport you to his basement. If this happens you will receive the achievement ''[[His True Face]]'' and face [[Armenius (Creature)|Armenius]]. This is a rare achievement which is supposedly obtainable through another method, but this is undiscovered. |
||
| − | + | When you have cast "''alori mort''" on [[Armenius]], report back to [[Julius]]. |
|
| + | === Mission 04: The Dark Lands === |
||
| − | '''NOTE''': You can go directly to [[Armenius]] to say the spell, because he is the head vampire. Be careful, he can teleport you to the sewers. |
||
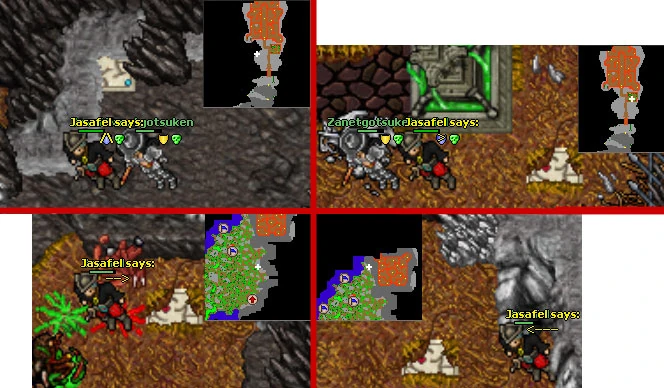
| + | Go to [[Harlow]] at the [[Trade Quarter]] docks and ask for passage to [[Vengoth]]. Search [[Vengoth]] for at least 5 strange spots and use [[Julius' Map]] to mark them. [[Julius]] requires the castle, but will accept any other 4. If you mark more than 5 spots then [[Julius]] will offer an experience reward for each additional spot, up to a maximum of 7500 experience for all 8. Marking all 8 is one of the requirements for the [[Castlemania]] [[achievement]]. |
||
| − | Report back to [[Julius]]. |
||
| + | Since the [[Vengoth/Castle|Vengoth Castle]] is required, you might as well do all 3 on the mountain, meaning only 2 on the surface. To reach the [[Vengoth/Castle|Vengoth Castle]], go up the mountain at the south-east of [[Vengoth]] and follow the mountain, entering [[Strange Whirl]]s. |
||
| − | <spoiler>If [[Armenius]] chooses to show you his true face, you will get an [[achievement]] called "his true face". However, it's extremelly rare and only few players were lucky. There is another way to obtain this achievement but it's not discovered yet.</spoiler> |
||
| + | The 8 unusual spots are: |
||
| − | === Mission 04: The Dark Lands === |
||
| + | * The ''bottomless pit'' (a [[Pitch Black Gap]]) {{Mapper Coords|128.181|123.33|7|2|text=here}} |
||
| − | |||
| + | * The ''bone circle'' (6 [[Bone Totem]]s) {{Mapper Coords|128.173|123.7|7|2|text=here}} |
||
| − | Go to [[Harlow]] (Trade Quarter) and ask for passage to [[Vengoth]]. |
||
| + | * The ''haunted ruin'' (small building with NPC [[A Wandering Soul]]) {{Mapper Coords|128.145|123.3|7|2|text=here}} |
||
| − | Explore the island to get the 5 strange spots and mark (use) your [[Julius' Map|map]] when you are on them. The easiest way to get the 5 spots is to first go to the stairs at the south east part of Vengoth, and then follow the path until you reach the castle. You should go past 5 "unusual spots" on the way. |
||
| + | * The ''lonely grave'' (Grave with inscription: ''You read: Shut your eyes Kiss me goodbye And sleep'') {{Mapper Coords|128.136|122.239|7|2|text=here}} |
||
| − | *The bottomless pit (a [[Pitch Black Gap]]) [http://tibia.wikia.com/wiki/Mapper?coords=128.181-123.33-7-2-1-1 here] |
||
| − | *The |
+ | * The ''miraculously burning trees'' (some [[Dead Tree]]s burning) {{Mapper Coords|128.116|123.13|7|2|text=here}} |
| − | *The haunted ruin (small building with NPC [[A Wandering Soul]]) [http://tibia.wikia.com/wiki/Mapper?coords=128.145-123.3-7-2-1-1 here] |
||
| − | *The lonely grave (Grave with inscription: ''You read: Shut your eyes Kiss me goodbye And sleep'') [http://tibia.wikia.com/wiki/Mapper?coords=128.136-122.239-7-2-1-1 here] |
||
| − | *The miraculously burning trees (some [[Dead Tree]]s burning) [http://tibia.wikia.com/wiki/Mapper?coords=128.116-123.13-7-2-1-1 here] |
||
On the mountains: |
On the mountains: |
||
| + | * The ''old shrine'' {{Mapper Coords|128.165|123.75|4|2|text=here}}. |
||
| − | |||
| − | * The |
+ | * The ''castle garden'' {{Mapper Coords|128.196|123.9|6|2|text=here}}. |
| − | * The castle |
+ | * (required) The ''castle entrance'' {{Mapper Coords|128.185|123.0|6|2|text=here}}. |
| − | * The castle entrance [http://tibia.wikia.com/wiki/Mapper?coords=128.185-123.0-6-2-1-1 here]. |
||
| − | |||
| − | To reach [[Vengoth/Castle]] just follow the path of the [[Energy Elemental]]s. The ''strange whirl'' |
||
| − | http://images2.wikia.nocookie.net/__cb20080108224861/tibia/en/images/archive/6/6e/20101206010727!Eternal_Winter.gif works as a teleport. If you want to avoid the Energy Elementals. The garden is populated by [[Gargoyle]]s. |
||
| − | |||
| − | [[Vengoth]]: |
||
[[Image:Blood_Brothers_Quest.jpg]] |
[[Image:Blood_Brothers_Quest.jpg]] |
||
| − | |||
| − | There are total of 8 unusual spots on the island and when you have more than 5 you will gain some exp from [[Julius]] (7500 for all 8 spots) |
||
| − | '''NOTE:''' The spot of the entrance to the castle (picture 7) its required by Julius. |
||
[[Image:Punto_5.jpg]] |
[[Image:Punto_5.jpg]] |
||
| Line 99: | Line 75: | ||
=== Mission 05: Into the Castle === |
=== Mission 05: Into the Castle === |
||
| + | This mission is split up into several smaller missions. The first one is to get a [[Blood Crystal]]. [[Julius]] tells you to ask around in Yalahar, this is how some NPCs respond to "blood crystal": |
||
| + | {{Infobox Transcript| |
||
| + | ''Player'': '''blood crystal'''<br /> |
||
| + | Znozel: Oooooooooh shiny shiny shiny shiny!! Give me!!<br /> |
||
| + | Redward: Huh? I think my master had one. But I really don't feel like going back and checking this for you. Sorry!<br /> |
||
| + | Morpel: No, I don't sell that, sorry.<br /> |
||
| + | Serafin: This is a fruit store. No slaughterhouse.<br /> |
||
| + | Soilance: No, haven't heard about that.<br /> |
||
| + | Lisander: No, that's wine I'm drinking.<br /> |
||
| + | Pugwah: Big red crystal. Some people talk about it in my tavern. But strange people those are!<br /> |
||
| + | Karith: I'm not interested in stuff like that.<br /> |
||
| + | Captain Cookie: That doesn't sound really tasty.<br /> |
||
| + | Lorietta: Ehehehe! A blood crystal? You must be a fool looking for one. I like fools. Why don't you check the cultist hideout in the magician quarter?<br /> |
||
| + | Palimuth: What would you need a blood crystal for? Maybe a magician knows where to find one.<br /> |
||
| + | Timothy: Oh yes, I heard about a gem like that. Nowadays they seem incredibly hard to acquire. The explorer's society doesn't own one, else I'd help you.<br /> |
||
| + | Dorbin: I agree, that would be a nice decoration object. Unfortunately I don't sell them.<br /> |
||
| + | Oiriz: Haha, they are not meant to be owned by ordinary humans. Sorry, but no.<br /> |
||
| + | Gree Dee: If I had one, I could charge a fortune for it... <gets a dreamy look><br /> |
||
| + | Chuckles: Oooh, you're playing with fire. <chuckles><br /> |
||
| + | Vincent: What's that supposed to be? Anyway, I don't sell it.<br /> |
||
| + | Zarak: A true warrior doesssn't need jewellery.<br /> |
||
| + | Maris: No, thanks.<br /> |
||
| + | Tony: Sorry... but uhm... please move on, I actually shouldn't chat with you.<br /> |
||
| + | Hal: What the h... heck are you talking about?<br /> |
||
| + | Bruce: I have nothing to say about that topic.<br /> |
||
| + | Reed: It's nice talking to you, but honestly, you give me the creeps. So please decide what you want and move on.<br /> |
||
| + | Tamoril: If I had one, I'd surely add it to my treasure and not give it to you.<br /> |
||
| + | Tamara: Oh! That cursed stone! I know about it, but I can't tell you anything. Evil gems like that shouldn't be passed around, only a crazy fool would do that.<br /> |
||
| + | Ethan: Tamara mentioned it sometime ago.<br /> |
||
| + | Barry: This is of no importance to me right now.<br /> |
||
| + | Oliver: I'll tell you that story another time, but not now. Sorry.<br /> |
||
| + | Peter: Listen, I don't get paid enough to chat with citizens. Move on.<br /> |
||
| + | Armenius: If you want blood, go kill a pig.<br /> |
||
| + | Harlow: What the heck, stop bothering me with your questions. |
||
| + | }} |
||
| + | |||
| + | Conclusion: [[Lorietta]]'s hint is most useful, although [[Tamara]] hints you should talk to [[Lorietta]] and [[Palimuth]] hints to the [[Magician Quarter]]. |
||
| + | Go to the [[Magician Quarter/Research Centre]]. Enter the centre through the Level 30 [[Gate of Expertise]] and also go through either Level 40 [[Gate of Expertise]] on floor -1. You will find the [[Blood Crystal]] past a [[Door (Sealed)]] in a [[Chest (Quest)]] on floor -3, {{Mapper Coords|128.8|121.129|10|4|text=here}}. |
||
| − | This mission is split up into several smaller missions. The first one is to get a [[Blood Crystal]]. Go and check out the cultist area in the [[Magician Quarter|Magicians Quarter]]. When you go down to the -3 floor of the research center building, open the chest inside the small quest room. You will find the [[Blood Crystal]] [http://tibia.wikia.com/wiki/Mapper?coords=128.7-121.134-10-3-1-1 near] . |
||
[[Image:Punto_4.jpg]] |
[[Image:Punto_4.jpg]] |
||
| Line 119: | Line 132: | ||
=== Mission 06: A Black History === |
=== Mission 06: A Black History === |
||
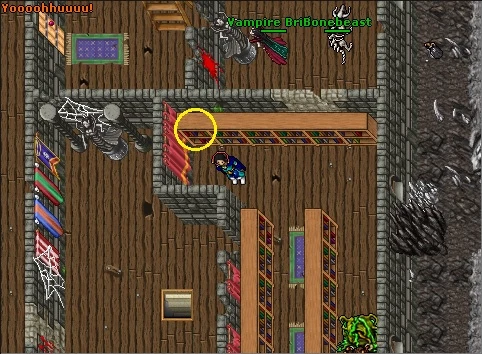
| + | Your next mission is to find any information on the castle. Enter the main hall and use the southern part of a small [[Old Carpet (Blue)]] in order to find a [[Closed Trapdoor]]. [[Use]] the trapdoor to [[Open Trapdoor|open]] it and go down. |
||
| − | |||
| − | Your next mission is to find any information on the castle. Therefore you should check the castle library. |
||
| − | |||
| − | Enter main hall and under a small carpet there is a secret trapdoor where you enter, use the carpet once to show the trapdoor and use the trapdoor to go down. |
||
[[Image:CastleTrapdoor.JPG]] |
[[Image:CastleTrapdoor.JPG]] |
||
| − | Once downstairs head south |
+ | Once downstairs, head '''south'''. You will face the following creatures in chronological order: |
| + | <table class="wikitable"> |
||
| − | Monsters downstairs: |
||
| + | <tr> |
||
| + | <th>Room</th> |
||
| + | <th>Creatures</th> |
||
| + | </tr> |
||
| + | <tr> |
||
| + | <td>1</td> |
||
| + | <td>1 [[Gargoyle]], 4 [[Bat]]s</td> |
||
| + | </tr> |
||
| + | <tr> |
||
| + | <td>2</td> |
||
| + | <td>2 [[Gargoyle]]s, 1 [[Tarantula]]</td> |
||
| + | </tr> |
||
| + | <tr> |
||
| + | <td>3</td> |
||
| + | <td>3 [[Vampire]]s, 1 [[Demon Skeleton]], 1 [[Skeleton]], 2 [[Bat]]s</td> |
||
| + | </tr> |
||
| + | <tr> |
||
| + | <td>4</td> |
||
| + | <td>1 [[Bonelord]], 1 [[Gargoyle]]</td> |
||
| + | </tr> |
||
| + | <tr> |
||
| + | <td>5</td> |
||
| + | <td>1 [[Tarantula]], 3 [[Skeleton]]s</td> |
||
| + | </tr> |
||
| + | <tr> |
||
| + | <td>6</td> |
||
| + | <td>1 [[Bonelord]], 3 [[Tarantula]]s, 3 [[Skeleton]]s, 3 [[Bat]]s</td> |
||
| + | </tr> |
||
| + | </table> |
||
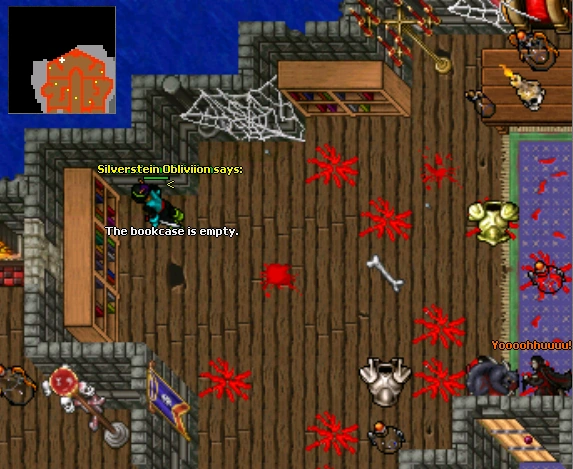
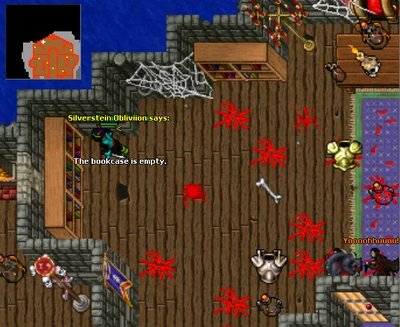
| + | You can now access the '''southeastern''' tower directly from the hallway anytime you wish. [[Arthei's Descent into Vampirism I (Book)]] is located inside a [[Bookcase (Quest)]] in this room ({{Mapper Coords|128.193|122.239|6|4|text=here}}). Take it back to [[Julius]] to complete the mission. |
||
| − | 1st room: 4 bats, 1 gargoyle |
||
| + | [[Image:CastleBook.JPG]] |
||
| − | 2nd room: 1 tarantula, 2 gargoyle |
||
| + | After receiving the first part of the diary, Julius would like you to bring him any other missing diary pages you might find so that he can piece together the entire story. He will give you 1000 experience points for each of the six [[Old Piece of Paper|diary pages]] you can find hidden inside several containers throughout the castle. Doing this is '''not required''' in order to be able to complete the quest, but it ''is'' one of the requirements for the [[Castlemania]] [[achievement]]. |
||
| − | 3rd room: 3 vampires, 1 demon skeleton, 2 bats, 1 skeleton |
||
| + | Proceed to the top of the tower if you wish to immediately obtain another part of [[Marziel]]'s diary. You will face the following creatures in chronological order: |
||
| − | 4th room: 1 Bonelord, 1 gargoyle |
||
| + | <table class="wikitable"> |
||
| − | 5th room: 3 skeletons, 1 tarantula |
||
| + | <tr> |
||
| + | <th>Room</th> |
||
| + | <th>Creatures</th> |
||
| + | </tr> |
||
| + | <tr> |
||
| + | <td>7</td> |
||
| + | <td>2 [[Demon Skeleton]]s, 1 [[Bonelord]], 2 [[Tarantula]]s, 3 [[Poison Spider]]s</td> |
||
| + | </tr> |
||
| + | <tr> |
||
| + | <td>8</td> |
||
| + | <td>1 [[Giant Spider]], 3 [[Demon Skeleton]]s, 2 [[Tarantula]]s, 3 [[Skeleton]]s</td> |
||
| + | </tr> |
||
| + | <tr> |
||
| + | <td>9</td> |
||
| + | <td>2 [[Giant Spider]]s, 1 [[Elder Bonelord]], 3 [[Tarantula]]s</td> |
||
| + | </tr> |
||
| + | <tr> |
||
| + | <td>10</td> |
||
| + | <td>2 [[Giant Spider]]s, 6 [[Poison Spider]]s, 12 [[Spider]]s</td> |
||
| + | </tr> |
||
| + | </table> |
||
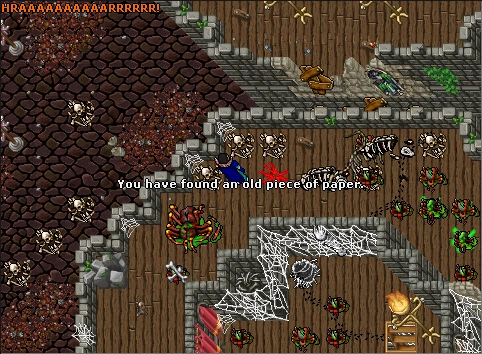
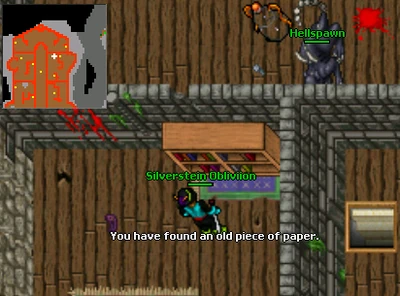
| + | [[Arthei's Descent into Vampirism II (Book)]] is located inside a [[Pile of Bones (Quest)]] in this room, below a [[Pile of Bones]] ({{Mapper Coords|128.196|122.239|2|4|text=here}}). |
||
| − | 6th room: 1 Bonelord, 3 skeletons, 2 bats, 2 tarantulas |
||
| + | [[File:Paper_2.png|thumb|384px|centre]] |
||
| − | Here you will gain access to enter on south-east tower freely and you'll find the book. |
||
| + | === Mission 07: Boreth === |
||
| − | [[Image:CastleBook.JPG]] |
||
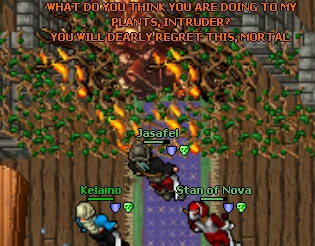
| + | Ask Julius for another mission. In this mission you will kill the first of the vampire lord brothers, [[Boreth]]. Bring a [[firebug]], go into the [[Open Trapdoor]] in the hall again and go '''west'''. You will face the following creatures in chronological order: |
||
| + | <table class="wikitable"> |
||
| − | Once you find a diary you can take it back to Julius. |
||
| + | <tr> |
||
| + | <th>Room</th> |
||
| + | <th>Creatures</th> |
||
| + | </tr> |
||
| + | <tr> |
||
| + | <td>1</td> |
||
| + | <td>2 [[Vampire]]s, 5 [[Bat]]s</td> |
||
| + | </tr> |
||
| + | <tr> |
||
| + | <td>2</td> |
||
| + | <td>3 [[Zombie]]s</td> |
||
| + | </tr> |
||
| + | <tr> |
||
| + | <td>3</td> |
||
| + | <td>3 [[Vampire]]s, 3 [[Zombie]]s</td> |
||
| + | </tr> |
||
| + | <tr> |
||
| + | <td>4</td> |
||
| + | <td>1 [[Vampire]], 2 [[Zombie]]s</td> |
||
| + | </tr> |
||
| + | <tr> |
||
| + | <td>5</td> |
||
| + | <td>1 [[Mutated Rat]], 3 [[Vampire]]s</td> |
||
| + | </tr> |
||
| + | <tr> |
||
| + | <td>6</td> |
||
| + | <td>4 [[Haunted Treeling]]s, 2 [[Vampire]]s</td> |
||
| + | </tr> |
||
| + | </table> |
||
| + | You can now access the '''southwestern''' tower directly from the hallway anytime you wish. Proceed upwards. You will face the following creatures on the next floor: |
||
| − | If you up this tower you will kill: |
||
| + | <table class="wikitable"> |
||
| − | 7th room: 1 Bonelord, 2 demon skeletons, 3 poison spiders, 2 tarantulas |
||
| + | <tr> |
||
| + | <th>Room</th> |
||
| + | <th>Creatures</th> |
||
| + | </tr> |
||
| + | <tr> |
||
| + | <td>7</td> |
||
| + | <td>4 [[Haunted Treeling]]s, 1 [[Mutated Rat]], 1 [[Vampire]]</td> |
||
| + | </tr> |
||
| + | </table> |
||
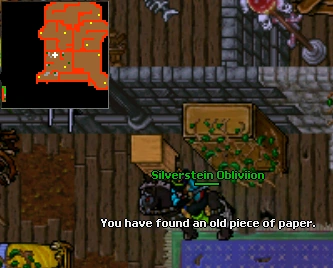
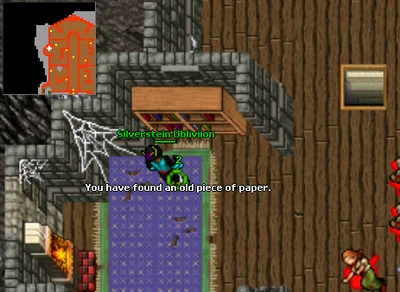
| + | [[Arthei's Descent into Vampirism III (Book)]] is located inside a [[Chest of Drawers (Quest)]] in this room ({{Mapper Coords|128.175|122.239|5|4|text=here}}). |
||
| − | 8th room: 3 skeletons, 2 tarantulas, 3 demon skeletons, 1 giant spider |
||
| + | [[File:Paper_1.png|thumb|centre|400px]] |
||
| − | 9th room: 3 tarantulas, 1 elder Bonelord, 2 giant spiders |
||
| + | Proceed to the top of the tower now. You will face the following creatures in chronological order: |
||
| − | 10th room: 2 giant spiders |
||
| + | <table class="wikitable"> |
||
| − | You will find a page of Marziel diary in this room. |
||
| + | <tr> |
||
| + | <th>Room</th> |
||
| + | <th>Creatures</th> |
||
| + | </tr> |
||
| + | <tr> |
||
| + | <td>8</td> |
||
| + | <td>1 [[Earth Elemental]], 2 [[Mutated Rat]]s, 2 [[Haunted Treeling]]s, 2 [[Vampire]]s</td> |
||
| + | </tr> |
||
| + | <tr> |
||
| + | <td>9</td> |
||
| + | <td>2 [[Bog Raider]]s, 1 [[Earth Elemental]], 5 [[Haunted Treeling]]s</td> |
||
| + | </tr> |
||
| + | <tr> |
||
| + | <td>10</td> |
||
| + | <td>None</td> |
||
| + | </tr> |
||
| + | </table> |
||
| + | Use a [[Fire Bug]] on the [[Twines]] three times to get teleported into a room with [[Boreth]] and 2 [[Plaguethrower]]s. After slaying him, use a [[Blessed Wooden Stake]] on his remains in order to obtain [[The Dust of Boreth]]. Take it back to [[Julius]] to complete the mission. |
||
| − | 11th room: 1 vampire bride, 1 giant spider |
||
| − | |||
| − | === Mission 07: Boreth === |
||
| − | |||
| − | In this mission you must find and kill one of the vampire lord brothers. Enter through the trapdoor, like you did before, take the door to the west, as soon you are down. Follow the way up. You need to use a [[Fire Bug]] on the plants 3 times and you will be teleported into the room with [[Boreth]] and his summons plus 2 plaguethrowers immediately. Kill him and use a blessed wooden stake on the remains of the vampire lord in order to obtain a special dust. Note, that you can kill him within a party. Just make sure, that every member of the party used the blessed wooden stake on him to obtain [[The Dust of Boreth]]. Go back with the dust and report to Julius for the next mission. |
||
[[Image:Paso_7_b.jpg]] |
[[Image:Paso_7_b.jpg]] |
||
=== Mission 08: Lersatio === |
=== Mission 08: Lersatio === |
||
| + | In this mission you will kill the second of the vampire lord brothers, [[Lersatio]]. Go into the [[Open Trapdoor]] in the hall again and go '''east'''. You will face the following creatures in chronological order: |
||
| + | <table class="wikitable"> |
||
| − | In this mission you must also find and kill one of the vampire lord brothers [[Lersatio]]. Get to the top of 3rd tower (like you did before). To wake up this vampire lord you need to break the mirrors in the 2 corners around his statue. After slaying him, use a blessed wooden stake on the remains in order to obtain [[The Dust of Lersatio]]. Go back with the dust and report to Julius for the next mission. |
||
| + | <tr> |
||
| + | <th>Room</th> |
||
| + | <th>Creatures</th> |
||
| + | </tr> |
||
| + | <tr> |
||
| + | <td>1</td> |
||
| + | <td>1 [[Priestess]], 3 [[Vampire]]s</td> |
||
| + | </tr> |
||
| + | <tr> |
||
| + | <td>2</td> |
||
| + | <td>1 [[Bonebeast]], 2 [[Nightstalker]]s</td> |
||
| + | </tr> |
||
| + | <tr> |
||
| + | <td>3</td> |
||
| + | <td>3 [[Vampire Bride]]s, 2 [[Nightstalker]]s</td> |
||
| + | </tr> |
||
| + | <tr> |
||
| + | <td>4</td> |
||
| + | <td>1 [[Vampire Bride]], 2 [[Bonebeast]]s, 1 [[Nightstalker]]</td> |
||
| + | </tr> |
||
| + | <tr> |
||
| + | <td>5</td> |
||
| + | <td>1 [[Vampire Bride]], 1 [[Bonebeast]], 2 [[Vampire]]s</td> |
||
| + | </tr> |
||
| + | <tr> |
||
| + | <td>6</td> |
||
| + | <td>3 [[Vampire Bride]]s, 2 [[Bonebeast]]s, 3 [[Vampire]]s</td> |
||
| + | </tr> |
||
| + | </table> |
||
| + | You can now access the '''northeastern''' tower directly from the hallway anytime you wish. [[Arthei's Descent into Vampirism IV (Book)]] is located inside a [[Bookcase (Quest)]] in this room ({{Mapper Coords|128.192|122.224|6|4|text=here}}). |
||
| − | 1st room: 1 priestess, 3 vampires |
||
| + | [[File:Paper_3.png|thumb|400px|centre]] |
||
| − | 2nd room: 2 nightstalkers, 1 bonebeast |
||
| + | Proceed to the top of the tower now. You will face the following creatures in chronological order: |
||
| − | 3rd room: 3 vampires bride, 2 nighstalkers |
||
| + | <table class="wikitable"> |
||
| − | 4th room: 1 nightstalker, 2 bonebeast, 1 vampire bride |
||
| + | <tr> |
||
| + | <th>Room</th> |
||
| + | <th>Creatures</th> |
||
| + | </tr> |
||
| + | <tr> |
||
| + | <td>7</td> |
||
| + | <td>4 [[Vampire Bride]]s, 2 [[Nightstalker]]s, 6 [[Vampire]]s</td> |
||
| + | </tr> |
||
| + | <tr> |
||
| + | <td>8</td> |
||
| + | <td>5 [[Vampire Bride]]s, 3 [[Vampire]]s</td> |
||
| + | </tr> |
||
| + | <tr> |
||
| + | <td>9</td> |
||
| + | <td>5 [[Vampire Bride]]s, 3 [[Bonebeast]]s, 2 [[Nightstalker]]s</td> |
||
| + | </tr> |
||
| + | <tr> |
||
| + | <td>10</td> |
||
| + | <td>None</td> |
||
| + | </tr> |
||
| + | </table> |
||
| + | Break two of the mirrors here to get teleported into a room with [[Lersatio]] and 2 [[Vampire]]s. After slaying him, use a [[Blessed Wooden Stake]] on his remains in order to obtain [[The Dust of Lersatio]]. Take it back to [[Julius]] to complete the mission. |
||
| − | 5th room: 2 vampires, 1 bonebeast, 1 vampire bride |
||
| + | === Mission 09: Marziel === |
||
| − | 6th room: 1 vampire bride, 2 vampire, 2 bonebeast |
||
| + | In this mission you will kill the third of the vampire lord brothers, [[Marziel]]. Go into the [[Open Trapdoor]] in the hall again and go '''north'''. You will face the following creatures in chronological order: |
||
| + | <table class="wikitable"> |
||
| − | Here you will gain access to enter on north-east tower freely and you will find a page of Marziel diary. |
||
| + | <tr> |
||
| + | <th>Room</th> |
||
| + | <th>Creatures</th> |
||
| + | </tr> |
||
| + | <tr> |
||
| + | <td>1</td> |
||
| + | <td>1 [[Vampire Bride]], 2 [[Banshee]]s, 1 [[Mutated Bat]]</td> |
||
| + | </tr> |
||
| + | <tr> |
||
| + | <td>2</td> |
||
| + | <td>3 [[Vampire Bride]]s, 2 [[Banshee]]s, 2 [[Mutated Bat]]s</td> |
||
| + | </tr> |
||
| + | <tr> |
||
| + | <td>3</td> |
||
| + | <td>2 [[Nightmare Scion]]s, 4 [[Vampire Bride]]s, 2 [[Bonebeast]]s, 3 [[Mutated Bat]]s</td> |
||
| + | </tr> |
||
| + | <tr> |
||
| + | <td>4</td> |
||
| + | <td>3 [[Nightmare Scion]]s, 3 [[Vampire Bride]]s, 1 [[Banshee]]</td> |
||
| + | </tr> |
||
| + | <tr> |
||
| + | <td>5</td> |
||
| + | <td>2 [[Vampire Bride]]s</td> |
||
| + | </tr> |
||
| + | <tr> |
||
| + | <td>6</td> |
||
| + | <td>1 [[Nightmare Scion]], 3 [[Vampire Bride]]s, 2 [[Banshee]]s, 1 [[Mutated Bat]], 1 [[Priestess]]</td> |
||
| + | </tr> |
||
| + | </table> |
||
| + | You can now access the '''northwestern''' tower directly from the hallway anytime you wish. [[Arthei's Descent into Vampirism V (Book)]] is located inside a [[Bookcase (Quest)]] in this room ({{Mapper Coords|128.171|122.227|6|4|text=here}}). |
||
| − | 7th room: 6 vampires, 4 vampires bride, 2 nighstalkers |
||
| + | [[File:Paper_4.png|thumb|400px|centre]] |
||
| − | 8th room: 3 vampires, 5 vampires bride |
||
| + | Proceed to the top of the tower now. You will face the following creatures in chronological order: |
||
| − | 9th room: 3 bonebeasts, 2 nighstalkers, 5 vampires bride |
||
| + | <table class="wikitable"> |
||
| − | 10th room: 2 vampires, Lersatio |
||
| + | <tr> |
||
| + | <th>Room</th> |
||
| + | <th>Creatures</th> |
||
| + | </tr> |
||
| + | <tr> |
||
| + | <td>7</td> |
||
| + | <td>1 [[Werewolf]], 5 [[Vampire Bride]]s</td> |
||
| + | </tr> |
||
| + | <tr> |
||
| + | <td>8</td> |
||
| + | <td>2 [[Werewolf|Werewolves]], 2 [[Nightmare Scion]]s, 4 [[Vampire Bride]]s</td> |
||
| + | </tr> |
||
| + | <tr> |
||
| + | <td>9</td> |
||
| + | <td>1 [[Nightmare]], 1 [[Werewolf]], 1 [[Nightmare Scion]], 4 [[Vampire Bride]]s</td> |
||
| + | </tr> |
||
| + | <tr> |
||
| + | <td>10</td> |
||
| + | <td>None</td> |
||
| + | </tr> |
||
| + | </table> |
||
| + | Have a female character step directly in front of the [[Vampire Lord Statue]] and use a [[Vial of Blood]] on her. Kill the 2 [[Vampire Bride]]s that just spawned to get teleported into a room with [[Marziel]] and 1 [[Vampire]]. After slaying him, use a [[Blessed Wooden Stake]] on his remains in order to obtain [[The Dust of Marziel]]. Take it back to [[Julius]] to complete the mission. |
||
| − | === Mission 09: Marziel === |
||
| − | |||
| − | In this mission you must find and kill another of the vampire lord brothers. To wake him up you need to have 1 vial of [[blood]] and '''1 female character''' in your team. She have to step in front of the statue (the statue will turn in something bloody red) and then use the vial of blood in front of it. When you step on the blood, 2 [[Vampire Bride]] will spawn next to you. When you kill them you will get teleported into the [[Marziel]]'s room. Kill him and use a [[blessed wooden stake]] on the remains of the vampire lord in order to obtain a [[The Dust of Marziel]].<br /> |
||
| − | Go back with the dust and report to Julius for the next mission. |
||
[[Image:Paso_8.jpg]] |
[[Image:Paso_8.jpg]] |
||
| Line 203: | Line 414: | ||
=== Mission 10: Arthei === |
=== Mission 10: Arthei === |
||
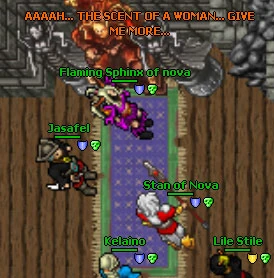
| + | In this mission you will kill the fourth and last of the vampire lord brothers, [[Arthei]]. Go into the [[Open Trapdoor]] in the hall again and go '''north''' again. You will face the following creatures in chronological order: |
||
| + | <table class="wikitable"> |
||
| − | Go to the north door (same door as before), you will have to kill creatures and keep walking until you find another door (North-East). Use that door and keep walking again, you will find the NPC [[A Fading Memory]] on the top of the 5th tower. On the upper floor is the boss room. Talk to the npc in order to get a [[Ghost's Tear]] which you need to summon the last boss using the [[Ghost's Tear]] on the vampire lord's statue. |
||
| + | <tr> |
||
| + | <th>Room</th> |
||
| + | <th>Creatures</th> |
||
| + | </tr> |
||
| + | <tr> |
||
| + | <td>1</td> |
||
| + | <td>1 [[Vampire Bride]], 2 [[Banshee]]s, 1 [[Mutated Bat]]</td> |
||
| + | </tr> |
||
| + | <tr> |
||
| + | <td>2</td> |
||
| + | <td>3 [[Vampire Bride]]s, 2 [[Banshee]]s, 2 [[Mutated Bat]]s</td> |
||
| + | </tr> |
||
| + | </table> |
||
| + | Enter the [[Sealed Door]] you will encounter in this room and follow the path. You will face the following creatures in chronological order: |
||
| − | When you have killed the last of the four [[Vampire Lords]] use a blessed wooden stake on the remains of the vampire lord in order to obtain [[The Dust of Arthei]]. Go back with the dust and report to Julius and you will obtain a [[Vampiric Crest]] which can be traded with [[Palimuth]] for outfit addon. |
||
| − | [[Video:Tibia Isara - Blood Brothers Quest - Mission 10: Arthei|centre|400px|Mission 10]] |
||
| + | <table class="wikitable"> |
||
| − | == Additional Missions == |
||
| + | <tr> |
||
| + | <th>Room</th> |
||
| + | <th>Creatures</th> |
||
| + | </tr> |
||
| + | <tr> |
||
| + | <td>3</td> |
||
| + | <td>2 [[Vampire Bride]]s, 2 [[Mutated Bat]]s, 1 [[Nightstalker]]</td> |
||
| + | </tr> |
||
| + | <tr> |
||
| + | <td>4</td> |
||
| + | <td>1 [[Spectre]], 2 [[Werewolf|Werewolves]], 1 [[Vampire Bride]]</td> |
||
| + | </tr> |
||
| + | <tr> |
||
| + | <td>5</td> |
||
| + | <td>2 [[Hellspawn]]s</td> |
||
| + | </tr> |
||
| + | <tr> |
||
| + | <td>6</td> |
||
| + | <td>2 [[Hellspawn]]s, 1 [[Spectre]], 2 [[Vampire Bride]]s, 2 [[Vampire]]s</td> |
||
| + | </tr> |
||
| + | </table> |
||
| + | You can now access the '''northern''' tower directly from the hallway anytime you wish. [[Arthei's Descent into Vampirism VI (Book)]] is located inside a [[Bookcase (Quest)]] in this room ({{Mapper Coords|128.177|122.214|6|4|text=here}}). |
||
| − | === Blood Goblet === |
||
| + | [[File:Paper_5.png|thumb|400px|centre]] |
||
| − | This "mission" isn't given by Julius. It's more of a treasure you can find when exploring the castle. In Arthei's tower there's a quest door that leads out onto the courtyard between the towers. After defeating all the vampire lords you can open this door. Out on the courtyard you can find a [[Blood Goblet]] inside a dead skeleton (south of the [[Sun Clock]]). |
||
| + | Proceed upwards. You will face the following creatures in chronological order: |
||
| − | === Missing diary pages === |
||
| + | <table class="wikitable"> |
||
| − | After completing mission 6 Julius asks you to bring any missing diary pages you can find in the castle. In each of the towers you can find a few [[Old Piece of Paper|diary pages]] inside bookcases, drawers, coffins and dead skeletons. You will get 1000 exp for each diary page you give to Julius. A total of 6 pages has been confirmed to exist, however if you say "diary" to Julius after giving all 6 he still asks if you have found any more. |
||
| + | <tr> |
||
| + | <th>Room</th> |
||
| + | <th>Creatures</th> |
||
| + | </tr> |
||
| + | <tr> |
||
| + | <td>7</td> |
||
| + | <td>6 [[Hellspawn]]s, 1 [[Spectre]], 4 [[Vampire Bride]]s, 1 [[Mutated Bat]], 2 [[Vampire]]s</td> |
||
| + | </tr> |
||
| + | <tr> |
||
| + | <td>8</td> |
||
| + | <td>4 [[Hellspawn]]s, 1 [[Spectre]], 3 [[Vampire Bride]]s</td> |
||
| + | </tr> |
||
| + | <tr> |
||
| + | <td>9</td> |
||
| + | <td>6 [[Hellspawn]]s, 3 [[Vampire Bride]]s, 4 [[Vampire]]s</td> |
||
| + | </tr> |
||
| + | </table> |
||
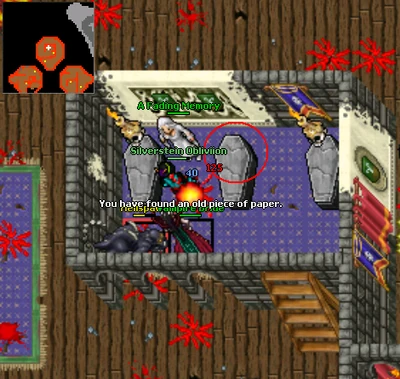
| + | Go up to NPC [[A Fading Memory]] and say '''hi'''/'''Kala'''/'''diary'''/'''yes'''/'''vampire'''/'''free soul'''/'''awaken''' to her in order to receive a [[Ghost's Tear]]. [[Arthei's Descent into Vampirism VII (Book)]] is located inside the [[Stone Coffin (Quest)]] directly to her right ({{Mapper Coords|128.185|122.208|3|4|text=here}}). |
||
| − | 1* First tower to the right 4 floors above the entrance. A floor that has 2 giant spiders and many spiders and poison spiders. The '''missing paper''' is inside a dead skeleton, that's under another dead skeleton in the northwest part of the room.<br /> |
||
| − | [[File:Paper_1.png|thumb|centre|400px]] |
||
| + | [[File:Paper_6.png|thumb|400px|centre]] |
||
| − | 2* First tower to the left 1 floor above the entrance. The '''missing paper''' is in a drawer in the northwest part of the room.<br /> |
||
| − | [[File:Paper_2.png|thumb|384px|centre]] |
||
| + | Now go up one more floor and use your tear twice on the [[Vampire Lord Statue]] to get teleported into a room with [[Arthei]] and 2 [[Vampire]]s. After slaying him, use a [[Blessed Wooden Stake]] on his remains in order to obtain [[The Dust of Arthei]]. Take it back to [[Julius]] to complete the mission. He will give you a [[Vampiric Crest]] for your efforts, which is used during the [[Yalaharian Outfits Quest]]. |
||
| − | 3* Second tower to the right on the entrance floor. The '''missing paper''' is in a bookcase in the northwest part of the room.<br /> |
||
| − | [[File:Paper_3.png|thumb|400px|centre]] |
||
| − | |||
| − | 4* Second tower to the left on the entrance floor. The '''missing paper''' is in a bookcase in the west part of the room.<br /> |
||
| − | [[File:Paper_4.png|thumb|400px|centre]] |
||
| − | |||
| − | 5* North tower on the entrance floor. The '''missing paper''' is in a bookcase west of the throne.<br /> |
||
| − | [[File:Paper_5.png|thumb|400px|centre]] |
||
| − | |||
| − | 6* North tower 3 floors above the entrance. The '''missing paper''' is in the middle coffin next to [[A Fading Memory|the npc]].<br /> |
||
| − | [[File:Paper_6.png|thumb|400px|centre]] |
||
| + | If you wish to obtain an additional award, however, you should enter the [[Sealed Door]] that provides access to the courtyard on your way down, which you have just unlocked. Use the [[Pile of Bones (Quest)]] {{Mapper Coords|128.185|122.242|4|4|text=here}} to obtain a [[Blood Goblet]]. You will face 3 [[Hellspawn]]s, 4 [[Werewolf|Werewolves]], and 3 [[Vampire Bride]]s. Obtaining the goblet is one of the requirements for the [[Castlemania]] [[achievement]]. |
||
| − | 7*? |
||
==Transcripts== |
==Transcripts== |
||
===Mission 01: Gaining Trust=== |
===Mission 01: Gaining Trust=== |
||
| + | {{Infobox Transcript| |
||
| − | {{Infobox_Transcript| |
||
''Player'': '''Hello'''<br /> |
''Player'': '''Hello'''<br /> |
||
[[Julius]]: Be greeted, adventurer ''player''. I assume you have read the note about the vampire threat in this city.<br /> |
[[Julius]]: Be greeted, adventurer ''player''. I assume you have read the note about the vampire threat in this city.<br /> |
||
| Line 252: | Line 502: | ||
Julius: I fear that will not do. Sorry.<br /> |
Julius: I fear that will not do. Sorry.<br /> |
||
}} |
}} |
||
| + | {{Infobox Transcript| |
||
| − | {{Infobox_Transcript| |
||
Julius: Be greeted, adventurer ''player''.<br /> |
Julius: Be greeted, adventurer ''player''.<br /> |
||
''Player'': '''mission'''<br /> |
''Player'': '''mission'''<br /> |
||
| Line 261: | Line 511: | ||
Julius: Fine then. Talk to me again about your mission once you have the garlic bread. You can get holy water from a member of the inquisition.<br /> |
Julius: Fine then. Talk to me again about your mission once you have the garlic bread. You can get holy water from a member of the inquisition.<br /> |
||
}} |
}} |
||
| + | {{Infobox Transcript| |
||
| − | {{Infobox_Transcript| |
||
''Player'': '''mission'''<br /> |
''Player'': '''mission'''<br /> |
||
Julius: Let me check - yes indeed, there's garlic in it. Now eat one, in front of my eyes. Right now! Say 'aaah' when you've chewed it all down so that I can see you're not hiding it!<br /> |
Julius: Let me check - yes indeed, there's garlic in it. Now eat one, in front of my eyes. Right now! Say 'aaah' when you've chewed it all down so that I can see you're not hiding it!<br /> |
||
| Line 275: | Line 525: | ||
}} |
}} |
||
===Mission 02: Bad Eggs=== |
===Mission 02: Bad Eggs=== |
||
| + | {{Infobox Transcript| |
||
| − | {{Infobox_Transcript| |
||
''Player'': '''mission'''<br /> |
''Player'': '''mission'''<br /> |
||
Julius: Are you back with confirmed names of possible vampires?<br /> |
Julius: Are you back with confirmed names of possible vampires?<br /> |
||
| Line 293: | Line 543: | ||
Julius: I guess Armenius, Lisander, Maris, Ortheus and Serafin are all the names we can get for now. Let me think for a moment what we are going to do, talk to me about your mission again later.<br /> |
Julius: I guess Armenius, Lisander, Maris, Ortheus and Serafin are all the names we can get for now. Let me think for a moment what we are going to do, talk to me about your mission again later.<br /> |
||
}} |
}} |
||
| + | {{Infobox Transcript| |
||
| − | {{Infobox_Transcript| |
||
''Player'': '''mission'''<br /> |
''Player'': '''mission'''<br /> |
||
Julius: Listen, I thought of something. If we could somehow figure out who among those five is their leader and manage to defeat him, the others might give up too. ...<br /> |
Julius: Listen, I thought of something. If we could somehow figure out who among those five is their leader and manage to defeat him, the others might give up too. ...<br /> |
||
| Line 305: | Line 555: | ||
}} |
}} |
||
===Mission 03: His True Face=== |
===Mission 03: His True Face=== |
||
| + | {{Infobox Transcript| |
||
| − | {{Infobox_Transcript| |
||
''Player'': '''alori mort'''<br /> |
''Player'': '''alori mort'''<br /> |
||
Lisander: Hold your tongue.<br /> |
Lisander: Hold your tongue.<br /> |
||
}} |
}} |
||
| + | {{Infobox Transcript| |
||
| − | {{Infobox_Transcript| |
||
''Player'': '''alori mort'''<br /> |
''Player'': '''alori mort'''<br /> |
||
Maris: Stop mumbling and don't bug me.<br /> |
Maris: Stop mumbling and don't bug me.<br /> |
||
}} |
}} |
||
| + | {{Infobox Transcript| |
||
| − | {{Infobox_Transcript| |
||
''Player'': '''alori mort'''<br /> |
''Player'': '''alori mort'''<br /> |
||
Serafin: There's something about these words which makes me feel awkward. Or maybe it's you who causes that feeling. You better get lost.<br /> |
Serafin: There's something about these words which makes me feel awkward. Or maybe it's you who causes that feeling. You better get lost.<br /> |
||
}} |
}} |
||
| + | {{Infobox Transcript| |
||
| − | {{Infobox_Transcript| |
||
''Player'': '''alori mort'''<br /> |
''Player'': '''alori mort'''<br /> |
||
Ortheus: Whatever that's supposed to mean.<br /> |
Ortheus: Whatever that's supposed to mean.<br /> |
||
}} |
}} |
||
| + | {{Infobox Transcript| |
||
| − | {{Infobox_Transcript| |
||
''Player'': '''alori mort'''<br /> |
''Player'': '''alori mort'''<br /> |
||
Armenius: ...... ...... ...<br /> |
Armenius: ...... ...... ...<br /> |
||
| Line 328: | Line 578: | ||
Armenius: Oh, the nerve. Go to the rats which raised you.<br /> |
Armenius: Oh, the nerve. Go to the rats which raised you.<br /> |
||
}} |
}} |
||
| + | Or... |
||
| − | {{Infobox_Transcript| |
||
| + | {{Infobox Transcript| |
||
| + | ''Player'': '''alori mort'''<br /> |
||
| + | Armenius: ...... ...... ...<br /> |
||
| + | Armenius: HAHAHAHAHA! What the... HAHAHAHA! Come on, say it again, just because it's so funny - and then I'll get rid of you, little mouse!<br /> |
||
| + | ''Player'': '''alori mort'''<br /> |
||
| + | Armenius: Oh, the nerve. Sod off.<br /> |
||
| + | }} |
||
| + | {{Infobox Transcript| |
||
''Player'': '''mission'''<br /> |
''Player'': '''mission'''<br /> |
||
Julius: Oh! You look horrible - I mean, rather weary. What happened? Who is the master vampire?<br /> |
Julius: Oh! You look horrible - I mean, rather weary. What happened? Who is the master vampire?<br /> |
||
| Line 334: | Line 592: | ||
Julius: I see... so Armenius is the master, and the spell didn't even cause a scratch on him... Well, that went worse than expected. Let me think for a moment and then ask me about a mission again.<br /><br /> |
Julius: I see... so Armenius is the master, and the spell didn't even cause a scratch on him... Well, that went worse than expected. Let me think for a moment and then ask me about a mission again.<br /><br /> |
||
}} |
}} |
||
| + | |||
===Mission 04: The Dark Lands=== |
===Mission 04: The Dark Lands=== |
||
| + | {{Infobox Transcript| |
||
| − | {{Infobox_Transcript| |
||
''Player'': '''mission'''<br /> |
''Player'': '''mission'''<br /> |
||
Julius: You know, I came to think that the spell didn't work because there is another, greater power behind all of this. I fear that if we don't find the source of the vampire threat we can't defeat them. ...<br /> |
Julius: You know, I came to think that the spell didn't work because there is another, greater power behind all of this. I fear that if we don't find the source of the vampire threat we can't defeat them. ...<br /> |
||
| Line 345: | Line 604: | ||
Julius: Also, they say there is a castle on this island. That mark HAS to be included, it's far too important to leave it out. Good luck!<br /> |
Julius: Also, they say there is a castle on this island. That mark HAS to be included, it's far too important to leave it out. Good luck!<br /> |
||
}} |
}} |
||
| + | {{Infobox Transcript| |
||
| − | {{Infobox_Transcript| |
||
''Player'': '''mission'''<br /> |
''Player'': '''mission'''<br /> |
||
Julius: Are you back with a useful map of Vengoth?<br /> |
Julius: Are you back with a useful map of Vengoth?<br /> |
||
| Line 352: | Line 611: | ||
}} |
}} |
||
===Mission 05: Into the Castle=== |
===Mission 05: Into the Castle=== |
||
| + | {{Infobox Transcript| |
||
| − | {{Infobox_Transcript| |
||
''Player'': '''mission'''<br /> |
''Player'': '''mission'''<br /> |
||
Julius: The spots you found on Vengoth are really interesting, especially the castle. There's something dark and spooky surrounding all of these places. ...<br /> |
Julius: The spots you found on Vengoth are really interesting, especially the castle. There's something dark and spooky surrounding all of these places. ...<br /> |
||
| Line 364: | Line 623: | ||
Julius: Fine then. Good luck!<br /> |
Julius: Fine then. Good luck!<br /> |
||
}} |
}} |
||
| + | {{Infobox Transcript| |
||
| − | {{Infobox_Transcript| |
||
''Player'': '''mission'''<br /> |
''Player'': '''mission'''<br /> |
||
Julius: As I said, I don't know where you might get a blood crystal - but did you find one?<br /> |
Julius: As I said, I don't know where you might get a blood crystal - but did you find one?<br /> |
||
| Line 374: | Line 633: | ||
Julius: Once you have a charged crystal, hurry back to me. I don't know how long that power will last. Good luck!<br /> |
Julius: Once you have a charged crystal, hurry back to me. I don't know how long that power will last. Good luck!<br /> |
||
}} |
}} |
||
| + | {{Infobox Transcript| |
||
| − | {{Infobox_Transcript| |
||
[[A Wandering Soul]]: I saw you... who are you... what do you want from me...?<br /> |
[[A Wandering Soul]]: I saw you... who are you... what do you want from me...?<br /> |
||
''Player'': '''blood crystal'''<br /> |
''Player'': '''blood crystal'''<br /> |
||
| − | + | A Wandering Soul: What the...? I don't know anything about that... still... the pain felt a little less intense for a second... relieving... but will never be gone.<br /> |
|
}} |
}} |
||
| + | If it is needed to charge [[Blood Crystal]] again: |
||
| − | {{Infobox_Transcript| |
||
| + | {{Infobox Transcript| |
||
| + | ''Player'': '''hi'''<br /> |
||
| + | A Wandering Soul: You... again... leave me finally alone in my mourning...<br /> |
||
| + | }} |
||
| + | {{Infobox Transcript| |
||
''Player'': '''mission'''<br /> |
''Player'': '''mission'''<br /> |
||
Julius: Ah! I can see in your eyes that you found someone! Do you have that charged crystal?<br /> |
Julius: Ah! I can see in your eyes that you found someone! Do you have that charged crystal?<br /> |
||
| Line 394: | Line 658: | ||
Julius: Great. You are impressing me more and more. Once you have been to the castle, come back and we will discuss further missions.<br /><br /> |
Julius: Great. You are impressing me more and more. Once you have been to the castle, come back and we will discuss further missions.<br /><br /> |
||
}} |
}} |
||
| + | |||
===Mission 06: A Black History=== |
===Mission 06: A Black History=== |
||
| + | {{Infobox Transcript| |
||
| − | {{Infobox_Transcript| |
||
''Player'': '''mission'''<br /> |
''Player'': '''mission'''<br /> |
||
Julius: Ah! Welcome back! So you have been inside the castle? Was it as spooky as in the stories told by people?<br /> |
Julius: Ah! Welcome back! So you have been inside the castle? Was it as spooky as in the stories told by people?<br /> |
||
Player: '''yes'''<br /> |
Player: '''yes'''<br /> |
||
| − | Julius: Well anyway, as it seems there's more than that door protecting the castle, since you were not able to proceed any further -and those ghosts patrolling the hallway seem invulnerable. ...<br /> |
+ | Julius: Well anyway, as it seems there's more than that door protecting the castle, since you were not able to proceed any further - and those ghosts patrolling the hallway seem invulnerable. ...<br /> |
Julius: I wonder what the story behind this place is. Maybe you can somehow find a way past the ghosts and deeper down into the castle. ...<br /> |
Julius: I wonder what the story behind this place is. Maybe you can somehow find a way past the ghosts and deeper down into the castle. ...<br /> |
||
Julius: If you could find some documents or books about this place there that would be a great help. Anything that tells us more about the master of this castle and how this place got so cursed. Could you do that?<br /> |
Julius: If you could find some documents or books about this place there that would be a great help. Anything that tells us more about the master of this castle and how this place got so cursed. Could you do that?<br /> |
||
| Line 405: | Line 670: | ||
Julius: Fine. You know, those old castle sometimes have hidden passages and stuff like that. That's at least what they say in fairytales. Good luck!<br /> |
Julius: Fine. You know, those old castle sometimes have hidden passages and stuff like that. That's at least what they say in fairytales. Good luck!<br /> |
||
}} |
}} |
||
| + | {{Infobox Transcript| |
||
| − | {{Infobox_Transcript| |
||
''Player'': '''mission'''<br /> |
''Player'': '''mission'''<br /> |
||
Julius: Did you find anything of interest inside the castle?<br /> |
Julius: Did you find anything of interest inside the castle?<br /> |
||
| Line 413: | Line 678: | ||
Julius: Thank you so much, I'll grant you a small bonus for that. Let me take a closer look, hmm. There are a lot of pages missing... but that last page is kind of disturbing. ...<br /> |
Julius: Thank you so much, I'll grant you a small bonus for that. Let me take a closer look, hmm. There are a lot of pages missing... but that last page is kind of disturbing. ...<br /> |
||
Julius: The name on the front page says 'Marziel'... and it seems that his brothers and himself have something to do with this place. ...<br /> |
Julius: The name on the front page says 'Marziel'... and it seems that his brothers and himself have something to do with this place. ...<br /> |
||
| − | Julius: There are a lot of missing pages... I wonder what happened after March 30th? Listen, should you stumble across any more pages,please bring them to me for a small reward. I'd really like to figure this out. ...<br /> |
+ | Julius: There are a lot of missing pages... I wonder what happened after March 30th? Listen, should you stumble across any more pages, please bring them to me for a small reward. I'd really like to figure this out. ...<br /> |
Julius: Apart from that, I guess to meet the brothers, you have to explore the castle even more. Maybe you can find another open door somewhere and look where - or who - it leads to?<br /> |
Julius: Apart from that, I guess to meet the brothers, you have to explore the castle even more. Maybe you can find another open door somewhere and look where - or who - it leads to?<br /> |
||
''Player'': '''yes'''<br /> |
''Player'': '''yes'''<br /> |
||
| Line 420: | Line 685: | ||
===Mission 07: Boreth=== |
===Mission 07: Boreth=== |
||
| + | {{Infobox Transcript| |
||
| − | {{Infobox_Transcript| |
||
''Player'': '''Mission'''<br /> |
''Player'': '''Mission'''<br /> |
||
Julius: Impressive. A plant-crazy vampire... didn't think something like that existed. Have you got proof of his death?<br /> |
Julius: Impressive. A plant-crazy vampire... didn't think something like that existed. Have you got proof of his death?<br /> |
||
| Line 431: | Line 696: | ||
===Mission 08: Lersatio=== |
===Mission 08: Lersatio=== |
||
| + | {{Infobox Transcript| |
||
| − | {{Infobox_Transcript| |
||
''Player'': '''Mission'''<br /> |
''Player'': '''Mission'''<br /> |
||
Julius: A vain vampire hoping to see his image in the mirror once again some day... how ironic. Have you got proof of his death?<br /> |
Julius: A vain vampire hoping to see his image in the mirror once again some day... how ironic. Have you got proof of his death?<br /> |
||
| Line 441: | Line 706: | ||
}} |
}} |
||
===Mission 10: Arthei=== |
===Mission 10: Arthei=== |
||
| + | {{Infobox Transcript| |
||
| − | {{Infobox_Transcript| |
||
''Player'': '''Hi'''<br /> |
''Player'': '''Hi'''<br /> |
||
[[A Fading Memory]]: Ohh...<br /> |
[[A Fading Memory]]: Ohh...<br /> |
||
Revision as of 20:11, 16 December 2019
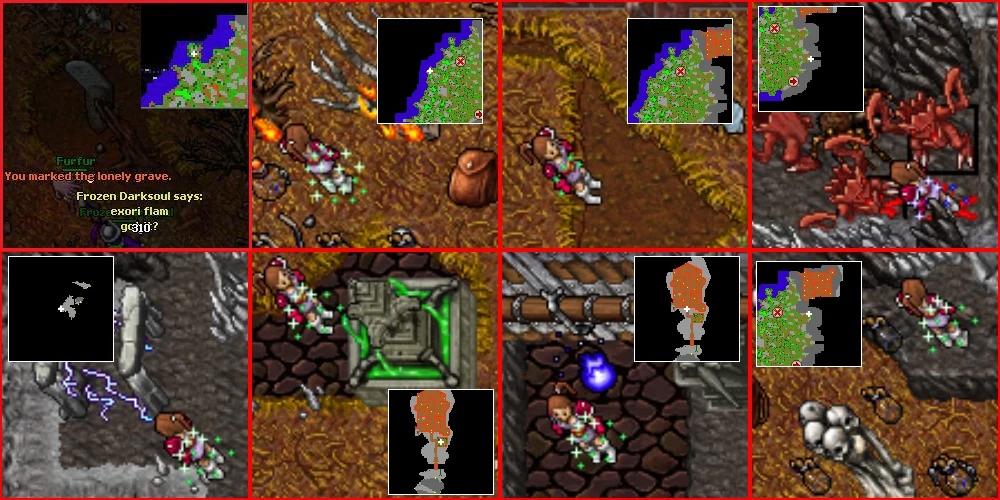
Legend
Yalahar is under attack by vampires, help Julius to save Yalahar!
Dangers
Scorpion, Slime, Tarantula, Haunted Treeling, Demon Skeleton, Vampire, Elder Bonelord, Energy Elemental, Bonelord, Banshee, Bat, Giant Spider, Hellspawn, Nightmare, Nightmare Scion, Nightstalker, Mutated Bat, Poison Spider, Spectre, Werewolf, War Wolf, Vampire, Zombie, Vampire Bride, Fury, Dark Torturer, also few boss monsters like Boreth, Lersatio, Marziel, Arthei and some more.
Reward
Access to Vengoth including the castle, Vampiric Crest or Yalaharian Outfits addon, 13200 exp (5 times 1000 exp, 1200 exp, 2400 exp and 3600 exp) also a Blood Goblet.
Requirements
Mission 1, additional requirements for those who haven't completed The Inquisition Quest - Mission 3: Vampire Hunt:
Missions 2-10:
- Special Flask (Holy Water)
- Bulb of Garlic
- Flour
- Baking Tray
- Blessed Wooden Stake
- Fire Bug
- Vial of Blood
- At least one female character for mission 9
Method
Go to Julius in the Trade Quarter and talk with him to start the quest.
For missions 6 to 10, if you do the quest "in one go", it could be helpful to have two friends keep clear the path from the boat on Vengoth to the entrance of the castle in the mountains, because you will have to walk this way about a dozen times and the monsters on the way could be really really annoying, depending on your level and walking speed.
Mission 01: Gaining Trust
- Note: if you have completed The Inquisition Quest - Mission 3: Vampire Hunt, you will skip this mission and instead start at Blood Brothers Quest - Mission 02: Bad Eggs.
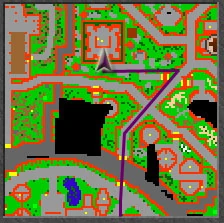
Wear a Garlic Necklace and talk to Julius in the Yalahar Trade Quarter (here). He will tell you that a Garlic Necklace is not enough proof that you are against the vampires, and will ask you to make Garlic Bread. Obtain Holy Water, Flour and a Bulb of Garlic; you can buy Holy Water from Henricus, obtain Bunch of Wheat from either Donald McRonald or by harvesting it and grind it into Flour, and a Bulb of Garlic from either Brasith (Ab'Dendriel) or Jezzara (Ankrahmun). Now use the Flour on the Holy Water to obtain a Lump of Holy Water Dough and then use the Lump of Holy Water Dough on the Bulb of Garlic to obtain a Lump of Garlic Dough. Use this on an Oven to make Garlic Bread; an oven can be found above Julius. When you have done this, eat it in front of Julius to prove yourself to him.
Mission 02: Bad Eggs
Julius wants you to find possible vampire suspects by tricking the citizens of Yalahar into eating Garlic Cookies and recording the names of those with suspicious reactions. To bake Garlic Cookies, obtain Holy Water, a Bulb of Garlic, Flour and a Baking Tray. Use the Flour on the Holy Water, then use the dough on the Bulb of Garlic. Next use this on the Baking Tray to obtain a Baking Tray (with Garlic Dough). Finally, use tray on the Oven to bake 12 Garlic Cookies (you only need 5); you can find an Oven directly above Julius.
When you have the Garlic Cookies, ask the citizens of Yalahar if they would like a Garlic Cookie. The NPCs you must ask are:
When you have confirmed the names of the Suspected Vampire NPCs, go back to Julius and report about your mission.
Mission 03: His True Face
Julius wants you to cast the spell "alori mort" on the Suspected Vampire NPCs. Say hi, and while facing them directly say the spell. You need only go to Armenius, the head vampire. There's a small chance that Armenius show you his true face, and will teleport you to his basement. If this happens you will receive the achievement His True Face and face Armenius. This is a rare achievement which is supposedly obtainable through another method, but this is undiscovered.
When you have cast "alori mort" on Armenius, report back to Julius.
Mission 04: The Dark Lands
Go to Harlow at the Trade Quarter docks and ask for passage to Vengoth. Search Vengoth for at least 5 strange spots and use Julius' Map to mark them. Julius requires the castle, but will accept any other 4. If you mark more than 5 spots then Julius will offer an experience reward for each additional spot, up to a maximum of 7500 experience for all 8. Marking all 8 is one of the requirements for the Castlemania achievement.
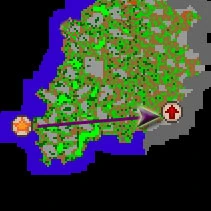
Since the Vengoth Castle is required, you might as well do all 3 on the mountain, meaning only 2 on the surface. To reach the Vengoth Castle, go up the mountain at the south-east of Vengoth and follow the mountain, entering Strange Whirls.
The 8 unusual spots are:
- The bottomless pit (a Pitch Black Gap) here
- The bone circle (6 Bone Totems) here
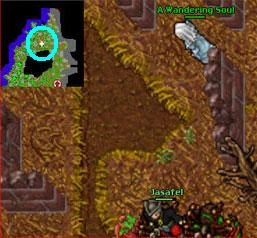
- The haunted ruin (small building with NPC A Wandering Soul) here
- The lonely grave (Grave with inscription: You read: Shut your eyes Kiss me goodbye And sleep) here
- The miraculously burning trees (some Dead Trees burning) here
On the mountains:
Once this is done go to Julius and ask for another mission.
Mission 05: Into the Castle
This mission is split up into several smaller missions. The first one is to get a Blood Crystal. Julius tells you to ask around in Yalahar, this is how some NPCs respond to "blood crystal":
|
Player: blood crystal |
|||
Conclusion: Lorietta's hint is most useful, although Tamara hints you should talk to Lorietta and Palimuth hints to the Magician Quarter.
Go to the Magician Quarter/Research Centre. Enter the centre through the Level 30 Gate of Expertise and also go through either Level 40 Gate of Expertise on floor -1. You will find the Blood Crystal past a Door (Sealed) in a Chest (Quest) on floor -3, here.
Once this is done go to Julius and ask for another mission.
Julius will tell you that you need to charge the crystal with the energy from someone who has lost everything. Go to the Wandering Soul on Vengoth and tell him "blood crystal". Now you have a charged crystal.
Go back to Julius and ask for another mission.
For this next part of the quest you need 4 people (total) who are on the same mission to continue. Make sure you have exactly 4 people on the same part otherwise you will have to wait until others reach this point in the quest. The blood crystal is charged only for the time being. You see it sparkling as long as it's charged. So in case you have to wait some longer to find the members for this part of the quest, you may need to recharge the crystal. For this just go back to the Wandering Soul, say "hi", "mission", "blood crystal" and you can continue with the quest.
Each of the 4 people will need their charged blood crystal for the next part of this mission. You must then find 4 strange carvings (which are partly buried), each player stands on one of the carvings. Two of them are on the ground floor, one near the castle and another near the poison shrine, right and left to the entry. As soon as the 4th member tapped onto his spot all will get teleported into the corridor of the castle. Inside you won't have to fear any monster. Once you have been there, go back to Julius and report your mission.
Mission 06: A Black History
Your next mission is to find any information on the castle. Enter the main hall and use the southern part of a small Old Carpet (Blue) in order to find a Closed Trapdoor. Use the trapdoor to open it and go down.

Once downstairs, head south. You will face the following creatures in chronological order:
| Room | Creatures |
|---|---|
| 1 | 1 Gargoyle, 4 Bats |
| 2 | 2 Gargoyles, 1 Tarantula |
| 3 | 3 Vampires, 1 Demon Skeleton, 1 Skeleton, 2 Bats |
| 4 | 1 Bonelord, 1 Gargoyle |
| 5 | 1 Tarantula, 3 Skeletons |
| 6 | 1 Bonelord, 3 Tarantulas, 3 Skeletons, 3 Bats |
You can now access the southeastern tower directly from the hallway anytime you wish. Arthei's Descent into Vampirism I (Book) is located inside a Bookcase (Quest) in this room (here). Take it back to Julius to complete the mission.
After receiving the first part of the diary, Julius would like you to bring him any other missing diary pages you might find so that he can piece together the entire story. He will give you 1000 experience points for each of the six diary pages you can find hidden inside several containers throughout the castle. Doing this is not required in order to be able to complete the quest, but it is one of the requirements for the Castlemania achievement.
Proceed to the top of the tower if you wish to immediately obtain another part of Marziel's diary. You will face the following creatures in chronological order:
| Room | Creatures |
|---|---|
| 7 | 2 Demon Skeletons, 1 Bonelord, 2 Tarantulas, 3 Poison Spiders |
| 8 | 1 Giant Spider, 3 Demon Skeletons, 2 Tarantulas, 3 Skeletons |
| 9 | 2 Giant Spiders, 1 Elder Bonelord, 3 Tarantulas |
| 10 | 2 Giant Spiders, 6 Poison Spiders, 12 Spiders |
Arthei's Descent into Vampirism II (Book) is located inside a Pile of Bones (Quest) in this room, below a Pile of Bones (here).

Mission 07: Boreth
Ask Julius for another mission. In this mission you will kill the first of the vampire lord brothers, Boreth. Bring a firebug, go into the Open Trapdoor in the hall again and go west. You will face the following creatures in chronological order:
| Room | Creatures |
|---|---|
| 1 | 2 Vampires, 5 Bats |
| 2 | 3 Zombies |
| 3 | 3 Vampires, 3 Zombies |
| 4 | 1 Vampire, 2 Zombies |
| 5 | 1 Mutated Rat, 3 Vampires |
| 6 | 4 Haunted Treelings, 2 Vampires |
You can now access the southwestern tower directly from the hallway anytime you wish. Proceed upwards. You will face the following creatures on the next floor:
| Room | Creatures |
|---|---|
| 7 | 4 Haunted Treelings, 1 Mutated Rat, 1 Vampire |
Arthei's Descent into Vampirism III (Book) is located inside a Chest of Drawers (Quest) in this room (here).
Proceed to the top of the tower now. You will face the following creatures in chronological order:
| Room | Creatures |
|---|---|
| 8 | 1 Earth Elemental, 2 Mutated Rats, 2 Haunted Treelings, 2 Vampires |
| 9 | 2 Bog Raiders, 1 Earth Elemental, 5 Haunted Treelings |
| 10 | None |
Use a Fire Bug on the Twines three times to get teleported into a room with Boreth and 2 Plaguethrowers. After slaying him, use a Blessed Wooden Stake on his remains in order to obtain The Dust of Boreth. Take it back to Julius to complete the mission.
Mission 08: Lersatio
In this mission you will kill the second of the vampire lord brothers, Lersatio. Go into the Open Trapdoor in the hall again and go east. You will face the following creatures in chronological order:
| Room | Creatures |
|---|---|
| 1 | 1 Priestess, 3 Vampires |
| 2 | 1 Bonebeast, 2 Nightstalkers |
| 3 | 3 Vampire Brides, 2 Nightstalkers |
| 4 | 1 Vampire Bride, 2 Bonebeasts, 1 Nightstalker |
| 5 | 1 Vampire Bride, 1 Bonebeast, 2 Vampires |
| 6 | 3 Vampire Brides, 2 Bonebeasts, 3 Vampires |
You can now access the northeastern tower directly from the hallway anytime you wish. Arthei's Descent into Vampirism IV (Book) is located inside a Bookcase (Quest) in this room (here).

Proceed to the top of the tower now. You will face the following creatures in chronological order:
| Room | Creatures |
|---|---|
| 7 | 4 Vampire Brides, 2 Nightstalkers, 6 Vampires |
| 8 | 5 Vampire Brides, 3 Vampires |
| 9 | 5 Vampire Brides, 3 Bonebeasts, 2 Nightstalkers |
| 10 | None |
Break two of the mirrors here to get teleported into a room with Lersatio and 2 Vampires. After slaying him, use a Blessed Wooden Stake on his remains in order to obtain The Dust of Lersatio. Take it back to Julius to complete the mission.
Mission 09: Marziel
In this mission you will kill the third of the vampire lord brothers, Marziel. Go into the Open Trapdoor in the hall again and go north. You will face the following creatures in chronological order:
| Room | Creatures |
|---|---|
| 1 | 1 Vampire Bride, 2 Banshees, 1 Mutated Bat |
| 2 | 3 Vampire Brides, 2 Banshees, 2 Mutated Bats |
| 3 | 2 Nightmare Scions, 4 Vampire Brides, 2 Bonebeasts, 3 Mutated Bats |
| 4 | 3 Nightmare Scions, 3 Vampire Brides, 1 Banshee |
| 5 | 2 Vampire Brides |
| 6 | 1 Nightmare Scion, 3 Vampire Brides, 2 Banshees, 1 Mutated Bat, 1 Priestess |
You can now access the northwestern tower directly from the hallway anytime you wish. Arthei's Descent into Vampirism V (Book) is located inside a Bookcase (Quest) in this room (here).

Proceed to the top of the tower now. You will face the following creatures in chronological order:
| Room | Creatures |
|---|---|
| 7 | 1 Werewolf, 5 Vampire Brides |
| 8 | 2 Werewolves, 2 Nightmare Scions, 4 Vampire Brides |
| 9 | 1 Nightmare, 1 Werewolf, 1 Nightmare Scion, 4 Vampire Brides |
| 10 | None |
Have a female character step directly in front of the Vampire Lord Statue and use a Vial of Blood on her. Kill the 2 Vampire Brides that just spawned to get teleported into a room with Marziel and 1 Vampire. After slaying him, use a Blessed Wooden Stake on his remains in order to obtain The Dust of Marziel. Take it back to Julius to complete the mission.
Mission 10: Arthei
In this mission you will kill the fourth and last of the vampire lord brothers, Arthei. Go into the Open Trapdoor in the hall again and go north again. You will face the following creatures in chronological order:
| Room | Creatures |
|---|---|
| 1 | 1 Vampire Bride, 2 Banshees, 1 Mutated Bat |
| 2 | 3 Vampire Brides, 2 Banshees, 2 Mutated Bats |
Enter the Sealed Door you will encounter in this room and follow the path. You will face the following creatures in chronological order:
| Room | Creatures |
|---|---|
| 3 | 2 Vampire Brides, 2 Mutated Bats, 1 Nightstalker |
| 4 | 1 Spectre, 2 Werewolves, 1 Vampire Bride |
| 5 | 2 Hellspawns |
| 6 | 2 Hellspawns, 1 Spectre, 2 Vampire Brides, 2 Vampires |
You can now access the northern tower directly from the hallway anytime you wish. Arthei's Descent into Vampirism VI (Book) is located inside a Bookcase (Quest) in this room (here).
Proceed upwards. You will face the following creatures in chronological order:
| Room | Creatures |
|---|---|
| 7 | 6 Hellspawns, 1 Spectre, 4 Vampire Brides, 1 Mutated Bat, 2 Vampires |
| 8 | 4 Hellspawns, 1 Spectre, 3 Vampire Brides |
| 9 | 6 Hellspawns, 3 Vampire Brides, 4 Vampires |
Go up to NPC A Fading Memory and say hi/Kala/diary/yes/vampire/free soul/awaken to her in order to receive a Ghost's Tear. Arthei's Descent into Vampirism VII (Book) is located inside the Stone Coffin (Quest) directly to her right (here).

Now go up one more floor and use your tear twice on the Vampire Lord Statue to get teleported into a room with Arthei and 2 Vampires. After slaying him, use a Blessed Wooden Stake on his remains in order to obtain The Dust of Arthei. Take it back to Julius to complete the mission. He will give you a Vampiric Crest for your efforts, which is used during the Yalaharian Outfits Quest.
If you wish to obtain an additional award, however, you should enter the Sealed Door that provides access to the courtyard on your way down, which you have just unlocked. Use the Pile of Bones (Quest) here to obtain a Blood Goblet. You will face 3 Hellspawns, 4 Werewolves, and 3 Vampire Brides. Obtaining the goblet is one of the requirements for the Castlemania achievement.
Transcripts
Mission 01: Gaining Trust
|
Player: Hello |
|||
|
Julius: Be greeted, adventurer player. |
|||
|
Player: mission |
|||
Mission 02: Bad Eggs
|
Player: mission |
|||
|
Player: mission |
|||
Mission 03: His True Face
|
Player: alori mort |
|||
|
Player: alori mort |
|||
|
Player: alori mort |
|||
|
Player: alori mort |
|||
|
Player: alori mort |
|||
Or...
|
Player: alori mort |
|||
|
Player: mission |
|||
Mission 04: The Dark Lands
|
Player: mission |
|||
|
Player: mission |
|||
Mission 05: Into the Castle
|
Player: mission |
|||
|
Player: mission |
|||
|
A Wandering Soul: I saw you... who are you... what do you want from me...? |
|||
If it is needed to charge Blood Crystal again:
|
Player: hi |
|||
|
Player: mission |
|||
Mission 06: A Black History
|
Player: mission |
|||
|
Player: mission |
|||
Mission 07: Boreth
|
Player: Mission |
|||
Mission 08: Lersatio
|
Player: Mission |
|||
Mission 10: Arthei
|
Player: Hi |
|||